Designing blockchain apps for Ledger devices
These guidelines describe best practices for designing a great experience for users of your app. Follow them to ensure your app passes the Ledger review process and delivers a consistent, trustworthy UX across all supported devices.
If you are developing your app using Ledger’s high-level APIs and standard transaction templates, your app will already conform to these design guidelines.
Which apps are covered?
These guidelines apply to blockchain-related apps that cover the standard use cases of sending crypto and NFTs, verifying addresses, or signing messages. This is the majority of apps available today on Ledger Wallet.
Apps with more specific needs and interfaces are not covered by these guidelines; however, the general principles on usability and wording described here are a great starting point. To access the complete NBGL component library if needed, visit the NBGL repository .
Ledger Stax, Flex, and Nano devices
Whether you start developing your app on Ledger Stax, Ledger Flex, Nano S Plus, or Nano X, porting it to other Ledger devices requires little to no code change, as all devices use the same APIs and graphical libraries.
 |
|---|
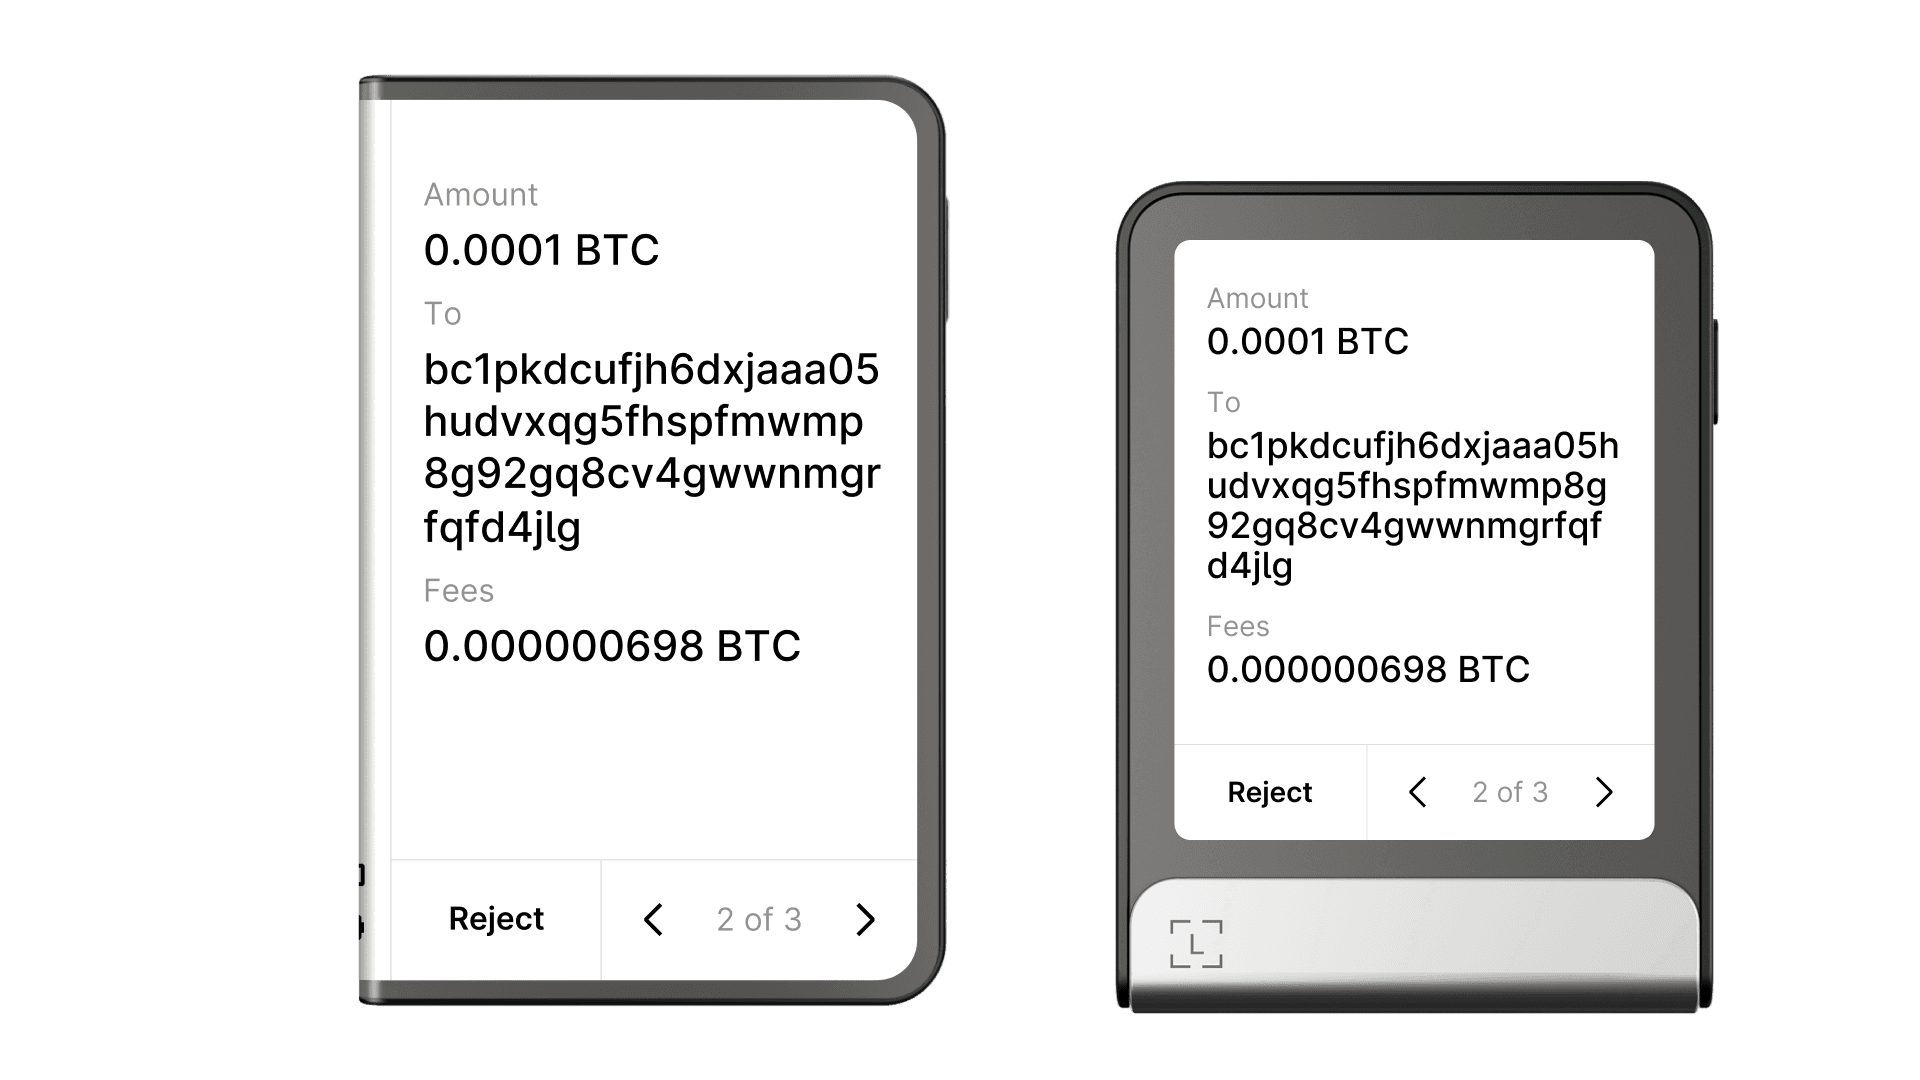
| The same app code scales to both Ledger Stax and Ledger Flex, including interaction and navigation differences. |
 |
|---|
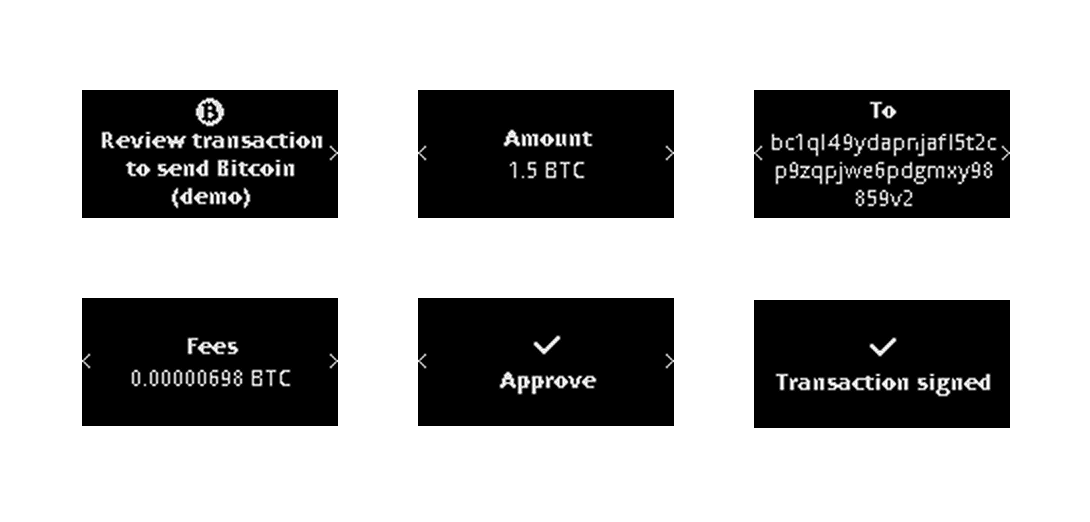
| On Ledger Nano S Plus and Nano X, the same transaction can result in multiple screens if needed. |
Your app’s UI is automatically adapted to the target device model when you build your app, dynamically adjusting size, elements, and number of pages. This works best when you use the high-level API endpoints known as “use cases”.
The NBGL library’s high-level “use case” functions handle layout, pagination, and navigation automatically. Prefer these over low-level rendering calls to stay in compliance with these guidelines with minimal effort.
In this section
- App home screen — the home screen structure, icon, and description.
- Transaction screens — the full transaction review and signing flow, including blind signing.
- Address verification — how to implement address confirmation screens.
- Info and settings — how to expose app metadata and user-configurable settings.
- Advanced interactions — streaming transactions, progressive disclosure, and other edge cases.
Next steps
Start with the app home screen to implement the entry point of your app, then follow the section order above to cover the full user journey. When you are ready to build and test, see the app boilerplate guide to set up your development environment.