Web Bluetooth
Introduction
In this section, we will guide you through the creation of an application.
This application will connect to your Ledger Nano X to display the address of your account (eg. bitcoin account, ethereum account).
This walkthrough will only work with a Ledger Nano X.
The Ledger Nano S and S Plus do not have Bluetooth connection.
Please be aware that the Bluetooth implementation is only supported by a few browsers.
You can check if your browser supports connections via Web Bluetooth.
One-time setup
Environment
Make sure you go through the prerequisites.
This web application is built with Next.js, which is a frontend React framework.
App Coding
App setup
First, open a terminal and create a new project. For this tutorial the project will be named “examples-web-bluetooth”.
From your Github folder or favourite examples folder, run:
npx create-next-app@latest examples-web-bluetoothYou will prompted a series of questions, answer as indicated below:
Would you like to use TypeScript? No
Would you like to use ESLint? No
Would you like to use Tailwind CSS? No
Would you like to use `src/`directory” No
Would you like to use App Router? (recommended) › No
Would you like to customize the default import alias (@/*)? No
Navigate to your app’s directory:
cd examples-web-bluetoothOpen the folder in an editor. The folder will contain these files:
 Fig. 1: Folder of the Application
Files
For this implemetation, you will only modify “index.js”, “_app.js”, and “Home.module.css”.
index.js
In pages/index.js replace the existing coe with the following:
export default function Home() {
  return (
    <div className={styles.container}>
      <App />
    </div>
  );
}
_app.js
In pages/_app.js replace the existing coe with the following:
import React, { Component } from "react";
import eip55 from "eip55";
import BluetoothTransport from "@ledgerhq/hw-transport-web-ble";
import AppEth from "@ledgerhq/hw-app-eth";
import styles from "../styles/Home.module.css";
import QRCode from "qrcode";

const delay = (ms) => new Promise((success) => setTimeout(success, ms));

class DeviceSelectionScreen extends Component {
  state = {
    devices: [],
  };

  createBLE = async () => {
    const transport = await BluetoothTransport.create();
    this.props.onSelectDevice(transport);
  };

  render() {
    return (
      <div className={styles.DeviceSelectionScreen}>
        <p>
          Power up your Ledger Nano X and enter your pin before continuing...
        </p>
        <button onClick={this.createBLE}>Connect with Bluetooth</button>
      </div>
    );
  }
}

class ShowAddressScreen extends Component {
  state = {
    error: null,
    address: null,
  };

  async componentDidMount() {
    while (!this.state.address) {
      if (this.unmounted) return;
      await this.fetchAddress(false);
      await delay(500);
    }
    this.fetchAddress(true);
    this.generateQRCode();
  }

  async componentWillUnmount() {
    this.unmounted = true;
  }

  fetchAddress = async (verify) => {
    const { transport } = this.props;
    try {
      const eth = new AppEth(transport);
      const path = "44'/60'/0'/0/0"; // HD derivation path
      const r = await eth.getAddress(path, verify);
      const address = eip55.encode(r.address);
      if (this.unmounted) return;
      this.setState({ address });
    } catch (error) {
      // in this case, user is likely not on Ethereum app
      console.warn("Failed: " + error.message);
      if (this.unmounted) return;
      this.setState({ error });
      return null;
    }
  };

  async generateQRCode() {
    try {
      const response = await QRCode.toCanvas(this.state.address);
      document.getElementById("qrcode").appendChild(response);
    } catch (error) {
      console.log(error);
    }
  }

  render() {
    const { address, error } = this.state;

    return (
      <div className={styles.ShowAddressScreen}>
        {!address ? (
          <>
            <p className={styles.loading}>Loading your Ethereum address...</p>
            {error ? (
              <p className={styles.error}>
                A problem occurred, make sure to open the Ethereum application
                on your Ledger Nano X. (
                {String((error && error.message) || error)})
              </p>
            ) : null}
          </>
        ) : (
          <>
            <strong>Ledger Live Ethereum Account 1</strong>
            <strong>{address}</strong>
            <div id="qrcode"></div>
          </>
        )}
      </div>
    );
  }
}

class App extends Component {
  state = {
    transport: null,
  };

  onSelectDevice = (transport) => {
    window.ledgerTransport = transport;
    transport.on("disconnect", () => {
      this.setState({ transport: null });
    });
    this.setState({ transport });
  };

  render() {
    const { transport } = this.state;
    return (
      <div className={styles.App}>
        {!transport ? (
          <DeviceSelectionScreen onSelectDevice={this.onSelectDevice} />
        ) : (
          <ShowAddressScreen transport={transport} />
        )}
      </div>
    );
  }
}

export default App;
Home.module.css
In Styles/Home.module.css replace the existing code with the following:
.container {
  min-height: 100vh;
  padding: 0 0.5rem;
  display: flex;
  flex-direction: column;
  justify-content: center;
  align-items: center;
  font-family:
    -apple-system, BlinkMacSystemFont, "Segoe UI", "Roboto", "Oxygen", "Ubuntu",
    "Cantarell", "Fira Sans", "Droid Sans", "Helvetica Neue", sans-serif;
  -webkit-font-smoothing: antialiased;
  -moz-osx-font-smoothing: grayscale;
}

.App {
  min-height: 100vh;
  display: flex;
  flex-direction: column;
  align-items: center;
  justify-content: center;
}

.App .DeviceSelectionScreen {
  display: flex;
  flex-direction: column;
  align-items: center;
  justify-content: center;
}

.App .ShowAddressScreen {
  display: flex;
  flex-direction: column;
  align-items: center;
  justify-content: center;
}

.App .error {
  color: #a00;
}

.App .ShowAddressScreen strong {
  margin: 1em;
}
Modify next.config.js
Remove reactStrictMode: true,
/** @type {import('next').NextConfig} */
const nextConfig = {}

module.exports = nextConfig
Dependencies
Installation
Run:
npm install --save @ledgerhq/hw-app-eth
npm install --save @ledgerhq/hw-transport-web-ble
npm install --save eip55| Package | What does it do? |
|---|---|
| @ledgerhq/hw-app-eth | It will help you ask your Nano to access the ethereum address. |
| @ledgerhq/hw-transport-web-ble | It provides you with all the methods to interact with your Ledger Nano X with a Bluetooth connexion. |
| eip55 | An EIP55 compatible address encoding library. |
Package.json
Now that the dependencies are installed you can find them in the “package.js”.
- Modify Scripts
- Check Contents
Modify Scripts
  "scripts": {
    "dev": "next dev",
    "build": "next build",
    "start": "next start"
  },
Check your “package.json” looks like this:
{
  "name": "test-bluetooth",
  "version": "0.1.0",
  "private": true,
  "scripts": {
    "dev": "next dev",
    "build": "next build",
    "start": "next start",
    "lint": "next lint"
  },
  "dependencies": {
    "@ledgerhq/hw-app-eth": "^6.35.1",
    "@ledgerhq/hw-transport-web-ble": "^6.28.1",
    "eip55": "^2.1.1",
    "next": "14.0.4",
    "react": "^18",
    "react-dom": "^18"
  }
}
App Launch
Enable Bluetooth
Make sure the Bluetooth feature of your Nano is enabled. To check, see here .
If it was not enabled, you need to: 1. enable it 2. power OFF your Nano 3. and power it back ON.
Start de Development Server
Now that the Setup is finished, the app has to be available to be displayed. Therefore start the development server:
npm run devNot all browsers support Bluetooth.
Please look at the browser support page .
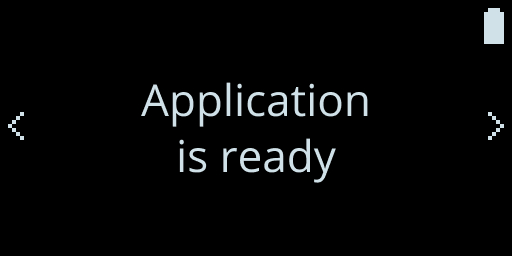
Now the application is up and running. Open the browser and go to localhost:3000, it will display :
 Fig. 2: Application Running on Browser
Launch Ethereum App
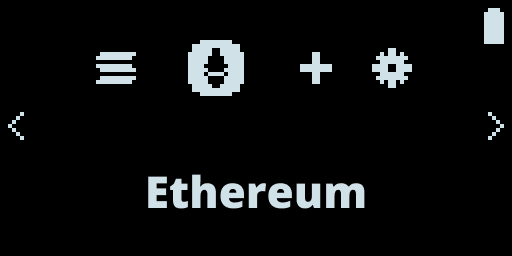
Before clicking on the button, unlock it and run the Ethereum application. The steps are described below.

Connect Your Nano to the Application
Now you can click on the button and a popup will be prompt. Choose your Ledger Nano X and click connexion
 Fig. 7: Connect the Nano with Bluetooth
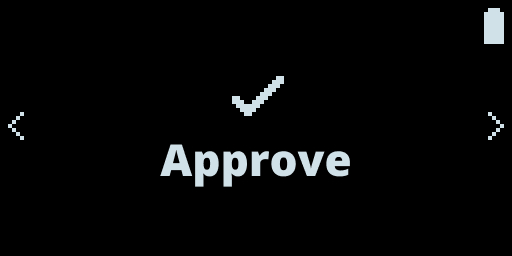
Then another popup will be prompt to ask you to confirm the pairing
 Fig. 8: Request of Pairing
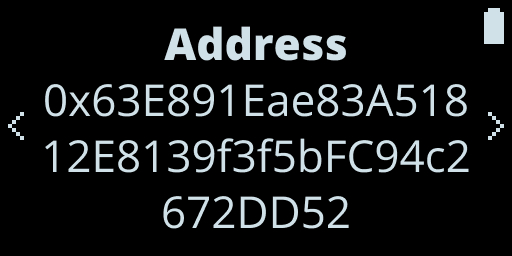
Finally, if all goes well the address must be displayed with the QR code
 Fig. 9: Address Account Displayed
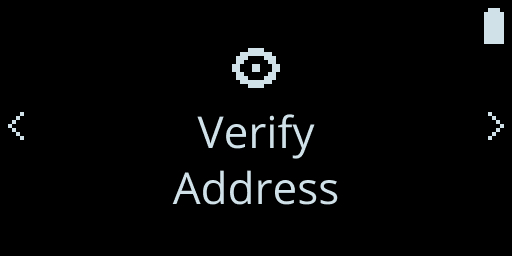
Verify the Address on Nano
For security reasons, the address will also be displayed on your Ledger Nano X to verify and confirm the address.
Congratulations you have successfully built your first application connected to your Ledger Nano X!