# Update mutable metadata manually
This guide will walk you through step-by-step instructions on how to update the JSON Metadata files of your NFTs to include the location (URL) of the Ledger Stax optimized image.
This guide consists of two parts:
1. Add the `ledger_stax_image` metadata to your JSON file.
2. Upload the JSON file on your storage service (centralized or decentralized).
> **Note:** Make sure that the dedicated secondary image of your NFT meets the Ledger Stax’s image requirements.
## 1. The ledger\_stax\_image Metadata
You can update the metadata of your NFT(s) for a single file or in batch.
### 1.1. Update your Metadata for a single file
1. Open the Metadata .JSON file of your NFT.
2. Add 2 new properties:
- a. A wrapper `ledger_metadata` meant to include all Ledger specific metadata.
- b. JSON attribute `ledger_stax_image` that points to the location (URL) of your Ledger Stax image:
```json copy
{
"ledger_metadata": {
"ledger_stax_image": "https://mystorage.com/25.jpeg" // Location of your Ledger Stax Image
}
}
```
> **Warning:** Please make sure that the image meets the Ledger Stax requirements.
3\. Your JSON Metadata file contains now a reference to the Ledger Stax image:
```json copy
{
"name": "Sample NFT Title",
"description": "Learn how add the Ledger Stax image URL in the metadata file.",
"image": "https://storage.googleapis.com/opensea-prod.appspot.com/puffs/25.png",
"attributes": [ ... ],
"ledger_metadata": {
"ledger_stax_image": "https://mystorage.com/25.jpeg"
}
}
```
### 1.2. Update your Metadata in bulk (Javascript)
You can append the `ledger_stax_image` attribute to the metadata across the whole collection (batch update). It can be easily accomplished using JavaScript.
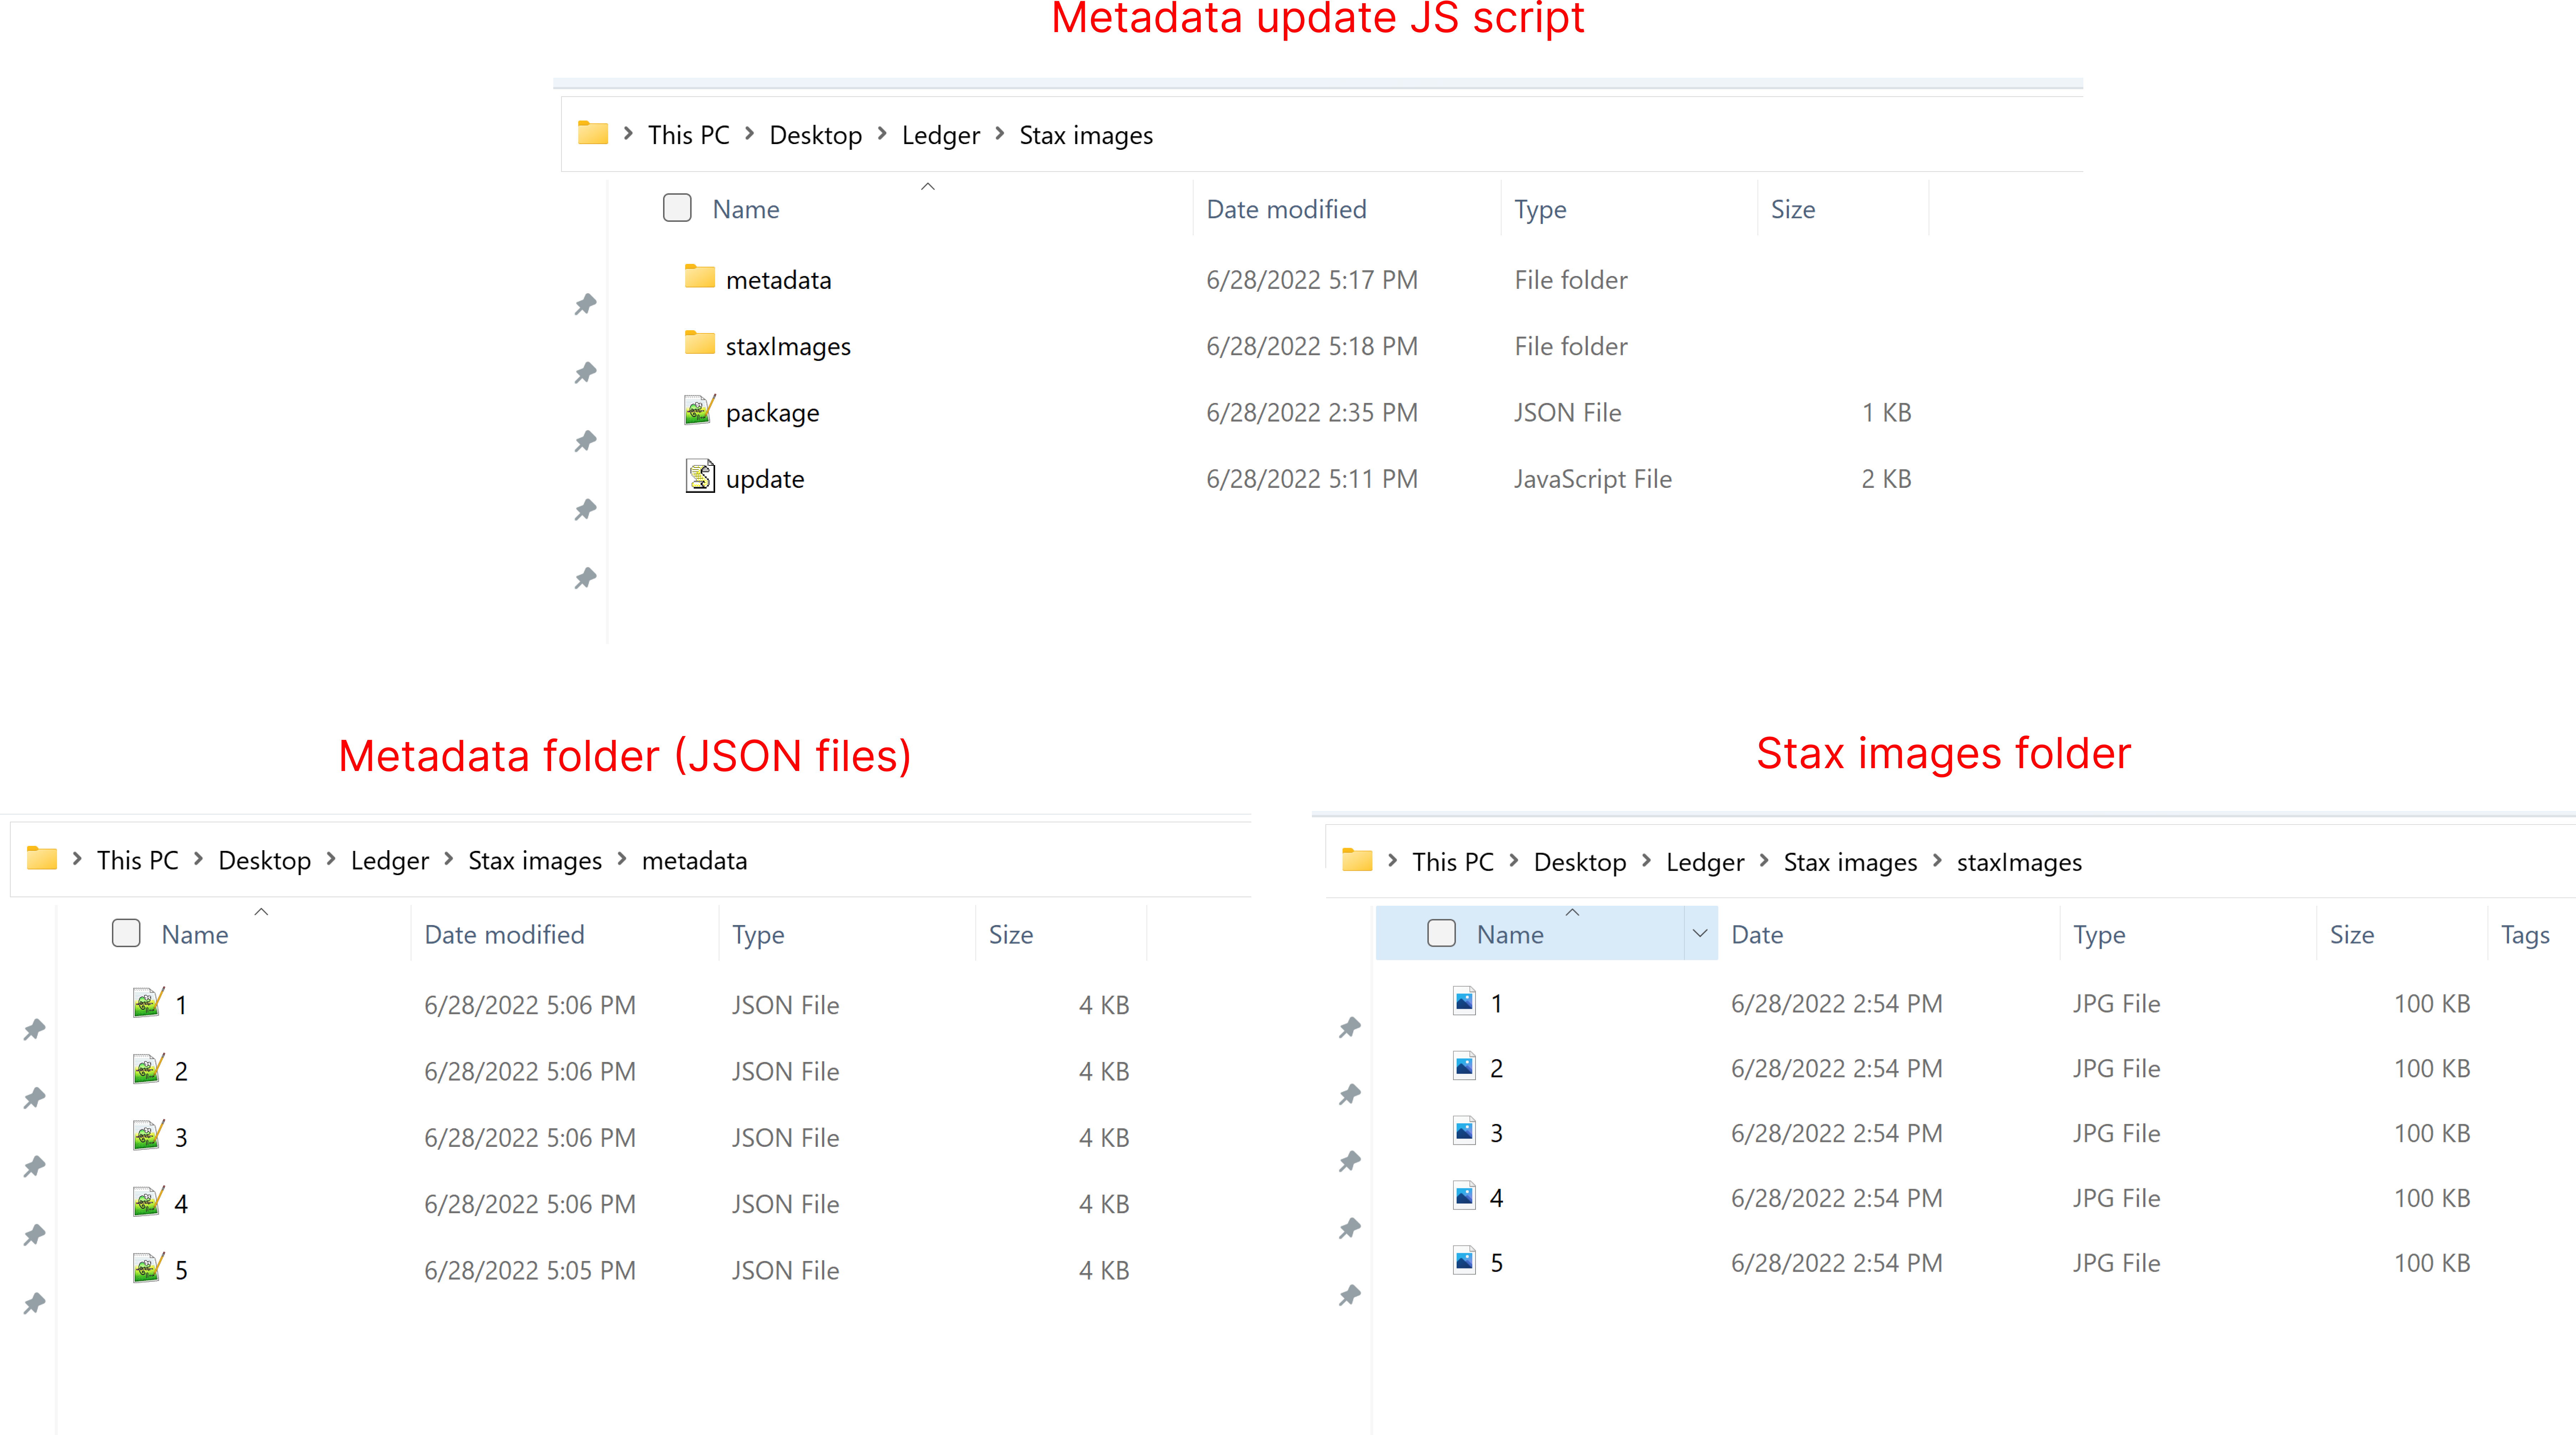
First, make sure to have the following settings on your local machine:
- Folder `metadata` that includes the Metadata JSON files of your collection.
- Folder `staxImages` that includes the Ledger Stax images files.
- Script “update.js” in the root folder (see below).
> **Warning:**
> - - The script assumes that the file names of your Ledger Stax images match the token IDs.
> - - For example: if you have two token IDs
25 and 30, the associated Ledger Stax images should be named 25.file\_extension and 30.file\_extension.
>
Below is a JS code snippet that will do the following operations:
1. Fetch locally each metadata JSON file of your token collection.
2. Verifiy if there is a Ledger Stax image available for this token.
3. If yes, append the attribute `ledger_stax_image` to the JSON.
```js copy
const fs = require('fs');
const path = require("path");
const localMetadataFolder = __dirname + '/metadata'; // folder where the JSON metadata files are stored locally
const localStaxFolder = __dirname + '/staxImages'; // folder where the Ledger Stax images are stored locally
const remoteStaxFolder = "https://collectionName.s3.amazonaws.com/" // base url (folder) where the Ledger Stax images are stored on the cloud.
const jsonsInDir = fs.readdirSync(localMetadataFolder);
// check if localStaxFolder has a Ledger Stax image for a given tokenID
function checkStaxImage(tokenId) {
var fileNames = fs.readdirSync(localStaxFolder); // put all file names into an array
for (const fileName of fileNames){
const staxImageName = path.parse(fileName).name; // remove file name extension
if(staxImageName == tokenId) {
return true;
}
}
return false;
}
jsonsInDir.forEach(file => {
const tokenId = path.parse(file).name;
// "ledger_stax_image" is appended only if we found a Ledger Stax Image for a given tokenID
if (checkStaxImage(tokenId)) {
const filePath = path.resolve(localMetadataFolder, file);
const data = fs.readFileSync(filePath);
const json = JSON.parse(data);
json.ledger_metadata = {"ledger_stax_image": remoteStaxFolder + file};
fs.writeFileSync(filePath, JSON.stringify(json, null, 4));
}
else {
console.log("No Ledger Stax Image found for" + tokenId);
}
});
```
## 2. Upload the updated metadata
Once your JSON files have been updated with the `ledger_stax_image` metadata, you need to upload them on the cloud. The upload process differs whether the JSON files are stored in a centralized storage service or not.
### 2.1. Centralized storage (S3, Google Cloud..)
If the Metadata .JSON files of your NFT collection are stored in a centralized storage service (AWS, Google Cloud, etc.), simply upload the updated JSON file(s) (including the `ledger_stax_image`) to your storage service.
You’re all set! It can take up to 24 hours for Ledger servers to process the changes.
### 2.2. Decentralized storage (IPFS)
If the Metadata .JSON files of your NFT collection are stored in a decentralized storage service like IPFS, please follow the below instructions:
1. Upload a new folder to IPFS that will include the JSON files of your `ledger_stax_image` Metadata. For the record, when you upload a folder to IPFS, it creates a [CID](https://docs.ipfs.tech/concepts/content-addressing/) that is a hash resultant from the actual contents of all of the files within your folder.
2. Copy the CID from the clipboard.
3. In your smart contract, set your `baseTokenURI` to `ipfs:///`
4. You’re all set! It can take up to 24 hours for Ledger servers to process the changes.