# React Native Bluetooth on iOS (Nano X only)## IntroductionIn this section, you will see how to create a React Native application using the [@ledgerhq/react-native-hw-transport-ble](https://github.com/LedgerHQ/ledger-live/tree/develop/libs/ledgerjs/packages/hw-transport-web-ble).
For this project some general prerequisites are mandatory and you can find them [here](../../getting-started#prerequisites).Then you can now go through the prerequisite for iOS development below.## One-time setup### EnvironnementMake sure you go through:1) the [prerequisites](../../info#prerequisites).
2) the [Mobile Environment Setup](./environment-setup).## App CodingNow that we have set up the prerequisites, you can now create the application.
In this integration, we will use the ethereum application.### App setupFirst, open a terminal and create a new project. For this tutorial the project will be named “myiOSBTApp”.Run:```console copy
react-native init myiOSBTApp
cd myiOSBTApp
```> **Note:** The dependencies of 'CocoaPods' may take some time to initialize.### FilesRun:```console copy
mkdir src
touch polyfill.js
touch src/DeviceItem.js
touch src/DeviceSelectionScreen.js
touch src/ShowAddressScreen.js
```#### polyfill.jsIn "polyfill.js", copy-paste the following code:```javascript copy
global.Buffer = require("buffer").Buffer;
```#### index.jsThen import the polyfill in "index.js" as shown below:```javascript copy
/**
* @format
*/
import "./polyfill"; //import this
import { AppRegistry } from "react-native";
import App from "./src/App"; //modify this import
import { name as appName } from "./app.json";
AppRegistry.registerComponent(appName, () => App);
```#### App.jsMove the file named "App.js" in the "src" folder and copy-paste the following code:```javascript copy
import React, { Component } from "react";
import DeviceSelectionScreen from "./DeviceSelectionScreen";
import ShowAddressScreen from "./ShowAddressScreen";
import TransportBLE from "@ledgerhq/react-native-hw-transport-ble";
// This is helpful if you want to see BLE logs. (only to use in dev mode)
class App extends Component {
state = {
transport: null,
};
onSelectDevice = async (device) => {
const transport = await TransportBLE.open(device);
transport.on("disconnect", () => {
// Intentionally for the sake of simplicity we use a transport local state
// and remove it on disconnect.
// A better way is to pass in the device.id and handle the connection internally.
this.setState({ transport: null });
});
this.setState({ transport });
};
render() {
const { transport } = this.state;
if (!transport) {
return ;
}
return ;
}
}
export default App;
```In "DeviceItem.js" copy-paste the following code:```javascript copy
import React, { Component } from "react";
import {
Text,
TouchableOpacity,
StyleSheet,
ActivityIndicator,
} from "react-native";
class DeviceItem extends Component {
state = {
pending: false,
};
onPress = async () => {
this.setState({ pending: true });
try {
await this.props.onSelect(this.props.device);
} finally {
this.setState({ pending: false });
}
};
render() {
const { device } = this.props;
const { pending } = this.state;
return (
{device.name}
{pending ? : null}
);
}
}
export default DeviceItem;
const styles = StyleSheet.create({
deviceItem: {
paddingVertical: 16,
paddingHorizontal: 32,
marginVertical: 8,
marginHorizontal: 16,
borderColor: "#ccc",
borderWidth: 1,
flexDirection: "row",
alignItems: "center",
justifyContent: "space-between",
},
deviceName: {
fontSize: 20,
fontWeight: "bold",
},
});
```In "DeviceSelectionScreen.js", copy-paste the following code:```javascript copy
import React, { Component } from "react";
import {
StyleSheet,
Text,
View,
TouchableOpacity,
FlatList,
Platform,
PermissionsAndroid
} from "react-native";
import { Observable } from "rxjs";
import AppEth from "@ledgerhq/hw-app-eth";
import TransportBLE from "@ledgerhq/react-native-hw-transport-ble";
import QRCode from "react-native-qrcode-svg";
import DeviceItem from "./DeviceItem";
const deviceAddition = device => ({ devices }) => ({
devices: devices.some(i => i.id === device.id)
? devices
: devices.concat(device)
});
class DeviceSelectionScreen extends Component {
state = {
devices: [],
error: null,
refreshing: false
};
async componentDidMount() {
// NB: this is the bare minimal. We recommend to implement a screen to explain to user.
if (Platform.OS === "android") {
await PermissionsAndroid.request(
PermissionsAndroid.PERMISSIONS.ACCESS_COARSE_LOCATION
);
}
let previousAvailable = false;
new Observable(TransportBLE.observeState).subscribe(e => {
if (e.available !== previousAvailable) {
previousAvailable = e.available;
if (e.available) {
this.reload();
}
}
});
this.startScan();
}
componentWillUnmount() {
if (this.sub) this.sub.unsubscribe();
}
startScan = async () => {
this.setState({ refreshing: true });
this.sub = new Observable(TransportBLE.listen).subscribe({
complete: () => {
this.setState({ refreshing: false });
},
next: e => {
if (e.type === "add") {
this.setState(deviceAddition(e.descriptor));
}
// NB there is no "remove" case in BLE.
},
error: error => {
this.setState({ error, refreshing: false });
}
});
};
reload = async () => {
if (this.sub) this.sub.unsubscribe();
this.setState(
{ devices: [], error: null, refreshing: false },
this.startScan
);
};
keyExtractor = (item: *) => item.id;
onSelectDevice = async device => {
try {
await this.props.onSelectDevice(device);
} catch (error) {
this.setState({ error });
}
};
renderItem = ({ item }: { item: * }) => {
return ;
};
ListHeader = () => {
const { error } = this.state;
return error ? (
Sorry, an error occured
{String(error.message)}
) : (
Scanning for Bluetooth...
Power up your Ledger Nano X and enter your pin.
);
};
render() {
const { devices, error, refreshing } = this.state;
return (
);
}
}
export default DeviceSelectionScreen;
const styles = StyleSheet.create({
header: {
paddingTop: 80,
paddingBottom: 36,
alignItems: "center"
},
headerTitle: {
fontSize: 22,
marginBottom: 16
},
headerSubtitle: {
fontSize: 12,
color: "#999"
},
list: {
flex: 1
},
errorTitle: {
color: "#c00",
fontSize: 16,
marginBottom: 16
}
});
```In "ShowAddressScreen.js", copy-paste the following code:```javascript copy
import React, { Component } from "react";
import { StyleSheet, Text, View } from "react-native";
import AppEth from "@ledgerhq/hw-app-eth";
import TransportBLE from "@ledgerhq/react-native-hw-transport-ble";
import QRCode from "react-native-qrcode-svg";
const delay = (ms) => new Promise((success) => setTimeout(success, ms));
class ShowAddressScreen extends Component {
state = {
error: null,
address: null,
};
async componentDidMount() {
while (!this.state.address) {
if (this.unmounted) return;
await this.fetchAddress(false);
await delay(500);
}
await this.fetchAddress(true);
}
async componentWillUnmount() {
this.unmounted = true;
}
fetchAddress = async (verify) => {
const { transport } = this.props;
try {
const eth = new AppEth(transport);
const path = "44'/60'/0'/0/0"; // HD derivation path
const { address } = await eth.getAddress(path, verify);
if (this.unmounted) return;
this.setState({ address });
} catch (error) {
// in this case, user is likely not on Ethereum app
if (this.unmounted) return;
this.setState({ error });
return null;
}
};
render() {
const { address, error } = this.state;
return (
{!address ? (
<>
Loading your Ethereum address...
{error ? (
A problem occurred, make sure to open the Ethereum application
on your Ledger Nano X. (
{String((error && error.message) || error)})
) : null}
) : (
<>
Ledger Live Ethereum Account 1
{address}
)}
);
}
}
export default ShowAddressScreen;
const styles = StyleSheet.create({
ShowAddressScreen: {
flex: 1,
padding: 16,
alignItems: "center",
justifyContent: "center",
},
error: {
color: "#c00",
fontSize: 16,
},
loading: {
color: "#999",
fontSize: 16,
},
title: {
fontSize: 22,
marginBottom: 16,
},
address: {
marginTop: 16,
color: "#555",
fontSize: 14,
},
});
```Your folder will look like this.
_Fig. 3: Folder of the Application_### Dependencies#### InstallationRun:```console copy
npm install --save react-native-qrcode-svg
npm install --save react-native-svg
npm install --save rxjs
npm install --save @ledgerhq/react-native-hw-transport-ble
npm install --save react-native-ble-plx
npx react-native link react-native-ble-plx
npm install --save buffer
npm install --save @ledgerhq/hw-app-eth
```| Package | What it does |
| ---------------------------------------------------------------------------------------------------------------------------------- | ---------------------------------------------------------------------------------------------------- |
| [react-native-qrcode-svg](https://www.npmjs.com/package/react-native-qrcode-svg) | It allows you to create a QR code. |
| [react-native-svg](https://www.npmjs.com/package/react-native-svg) | It is a mandatory package to use **react-native-qrcode-svg** |
| [rxjs](https://www.npmjs.com/package/rxjs) | It is a rewrite of "Reactive-Extensions/RxJS" and is the latest production-ready version of RxJS. |
| [@ledgerhq/hw-transport-web-ble](https://github.com/LedgerHQ/ledger-live/tree/develop/libs/ledgerjs/packages/hw-transport-web-ble) | It provides you with all the methods to interact with your Ledger Nano X with a Bluetooth connexion. |
| [react-native-ble-plx](https://www.npmjs.com/package/react-native-ble-plx) | It scans the bluetooth devices. |
| [buffer](https://www.npmjs.com/package/buffer) | The goal is to provide an API that is 100% identical to node's Buffer API. |
| [hw-app-eth](https://github.com/LedgerHQ/ledger-live/tree/develop/libs/ledgerjs/packages/hw-app-eth) | It helps you ask your Ledger device to access the ethereum address. |#### package.jsonNow that the dependencies are installed you can find them in the “package.js”.
This is how your “package.json” has to look like.```javascript copy
{
"name": "myiOSBTApp",
"version": "0.0.1",
"private": true,
"scripts": {
"android": "react-native run-android",
"ios": "react-native run-ios",
"start": "react-native start",
"test": "jest",
"lint": "eslint ."
},
"dependencies": {
"@ledgerhq/hw-app-eth": "^6.16.2",
"@ledgerhq/react-native-hw-transport-ble": "^6.15.0",
"buffer": "^6.0.3",
"react": "17.0.2",
"react-native": "0.66.3",
"react-native-ble-plx": "^2.0.3",
"react-native-qrcode-svg": "^6.1.1",
"react-native-svg": "^12.1.1",
"rxjs": "^7.4.0"
},
"devDependencies": {
"@babel/core": "^7.16.0",
"@babel/runtime": "^7.16.3",
"@react-native-community/eslint-config": "^3.0.1",
"babel-jest": "^27.3.1",
"eslint": "^8.3.0",
"jest": "^27.3.1",
"metro-react-native-babel-preset": "^0.66.2",
"react-test-renderer": "17.0.2"
},
"jest": {
"preset": "react-native"
}
}
```#### Pod InstallationThen the pod has to be installed in the "ios" folder:```console copy
cd ios/
pod install
pod update
```#### Enable BluetoothLaunch Xcode and open the ios folder in the "myiOSBTApp" folder to add the "NSBluetoothAlwaysUsageDescription" key to the "info.plist".
_Fig. 4: Open a Project on Xcode_
_Fig. 5: Choose the Project_
_Fig. 6: Add NSBluetoothAlwaysUsageDescription in info.plist_You can now test the application you have built.## App LaunchApp testing is done on your smartphone because the Xcode emulator cannot use Bluetooth or USB connexions.> **Note:** Please refer to the information for [iOS Emulator
> limitation](https://developer.apple.com/forums/thread/14983).### Build the AppTo build your application on your Apple device you have to connect Xcode to an Apple account as shown below.
_Fig. 7: Connect Xcode to an Apple Account_Then connect your Apple device to your computer to build the application directly on the Apple device.
If all goes well the device name will be displayed on the top of the Xcode window, all you have to do is click on the triangle icon on the top left corner to build the app on your Apple device.
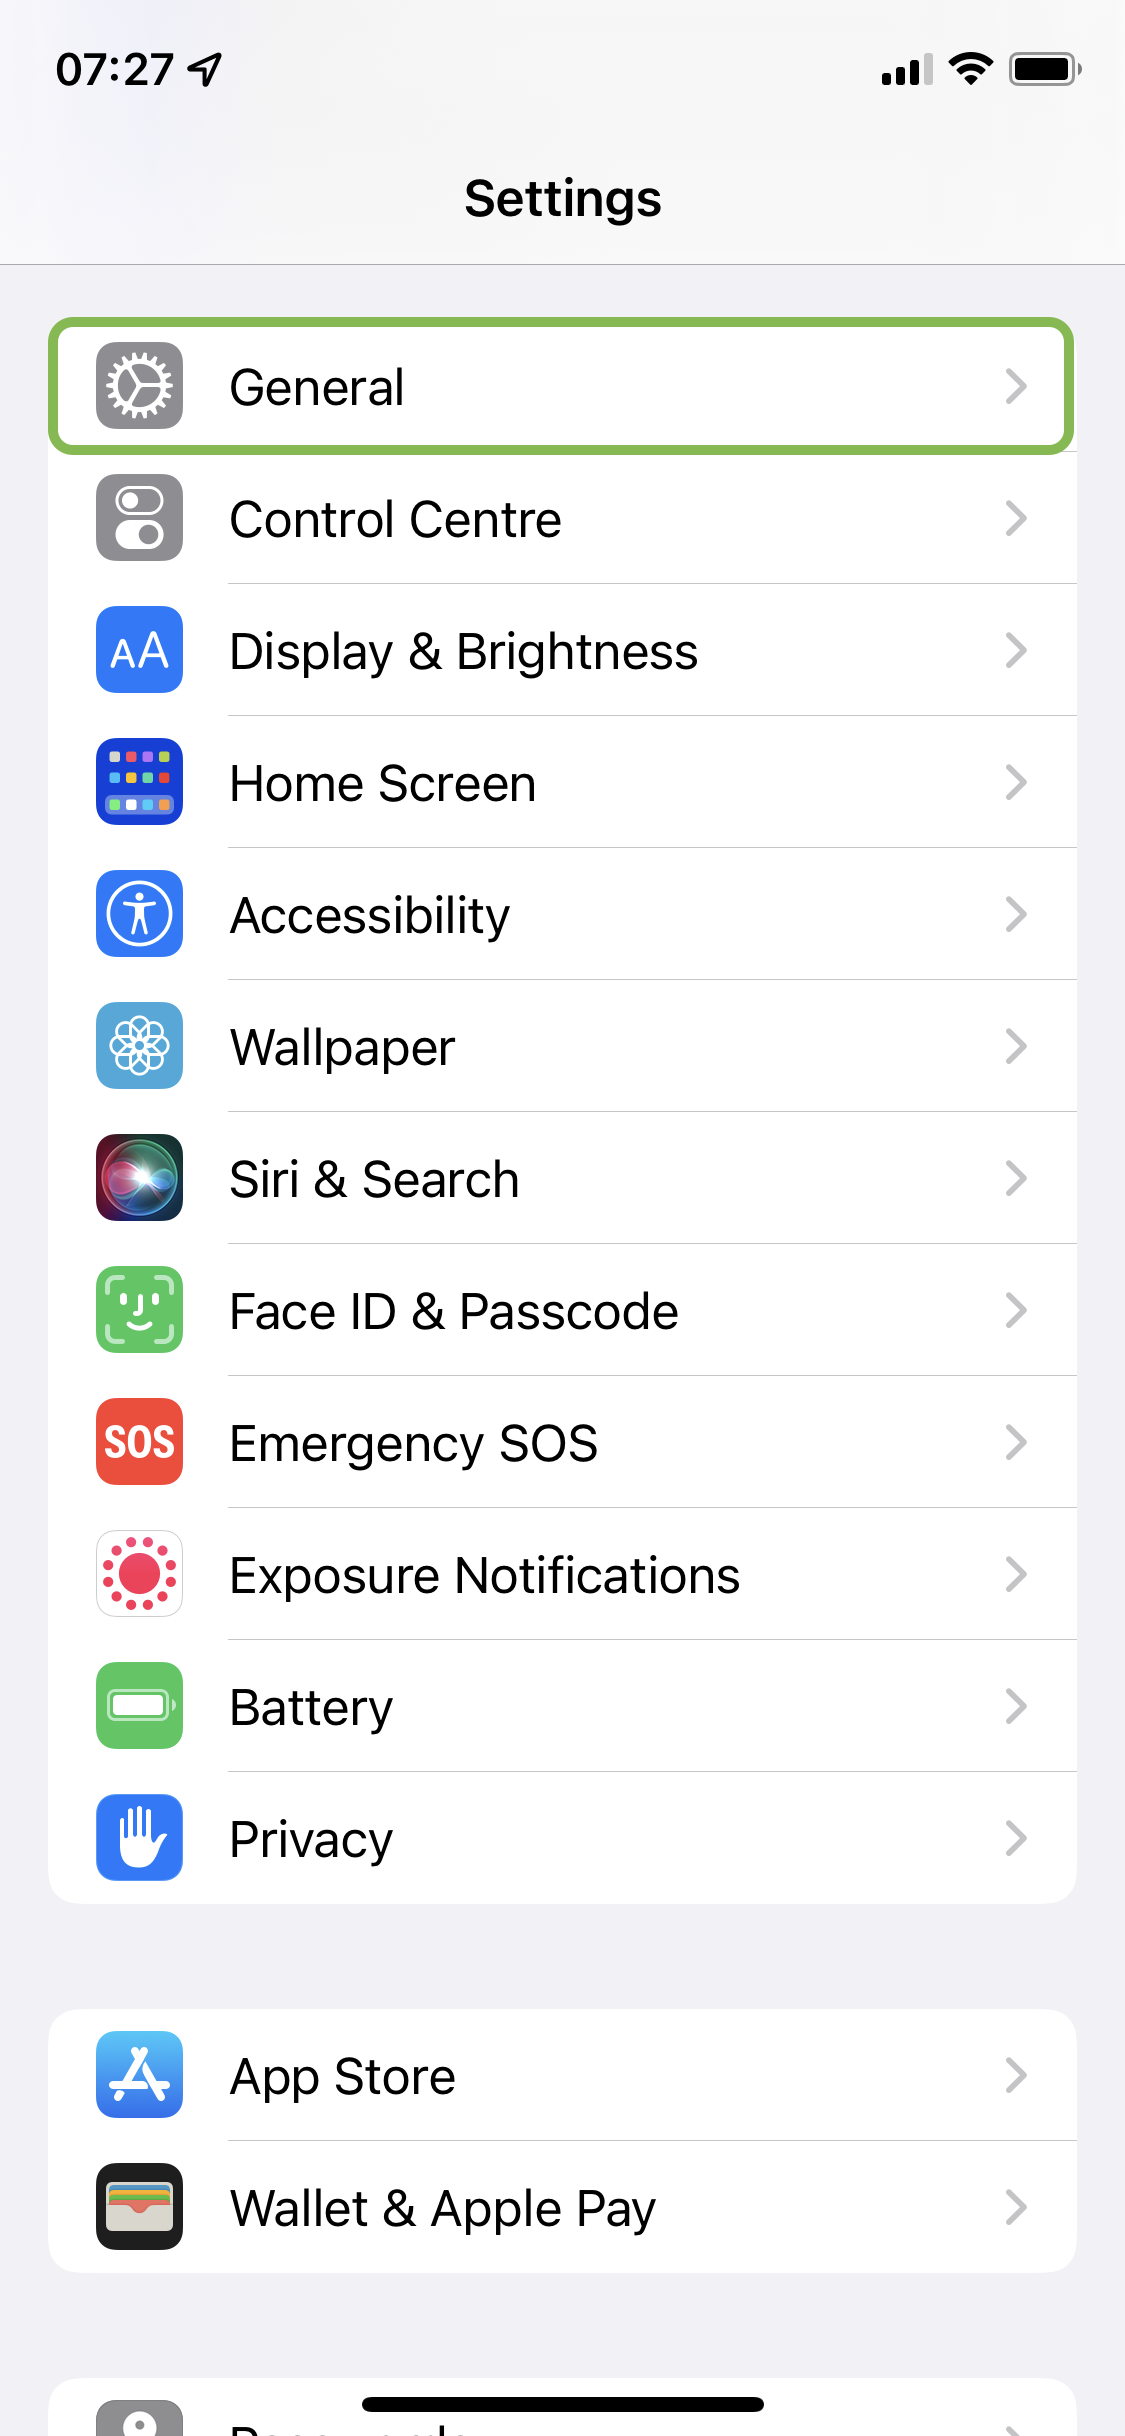
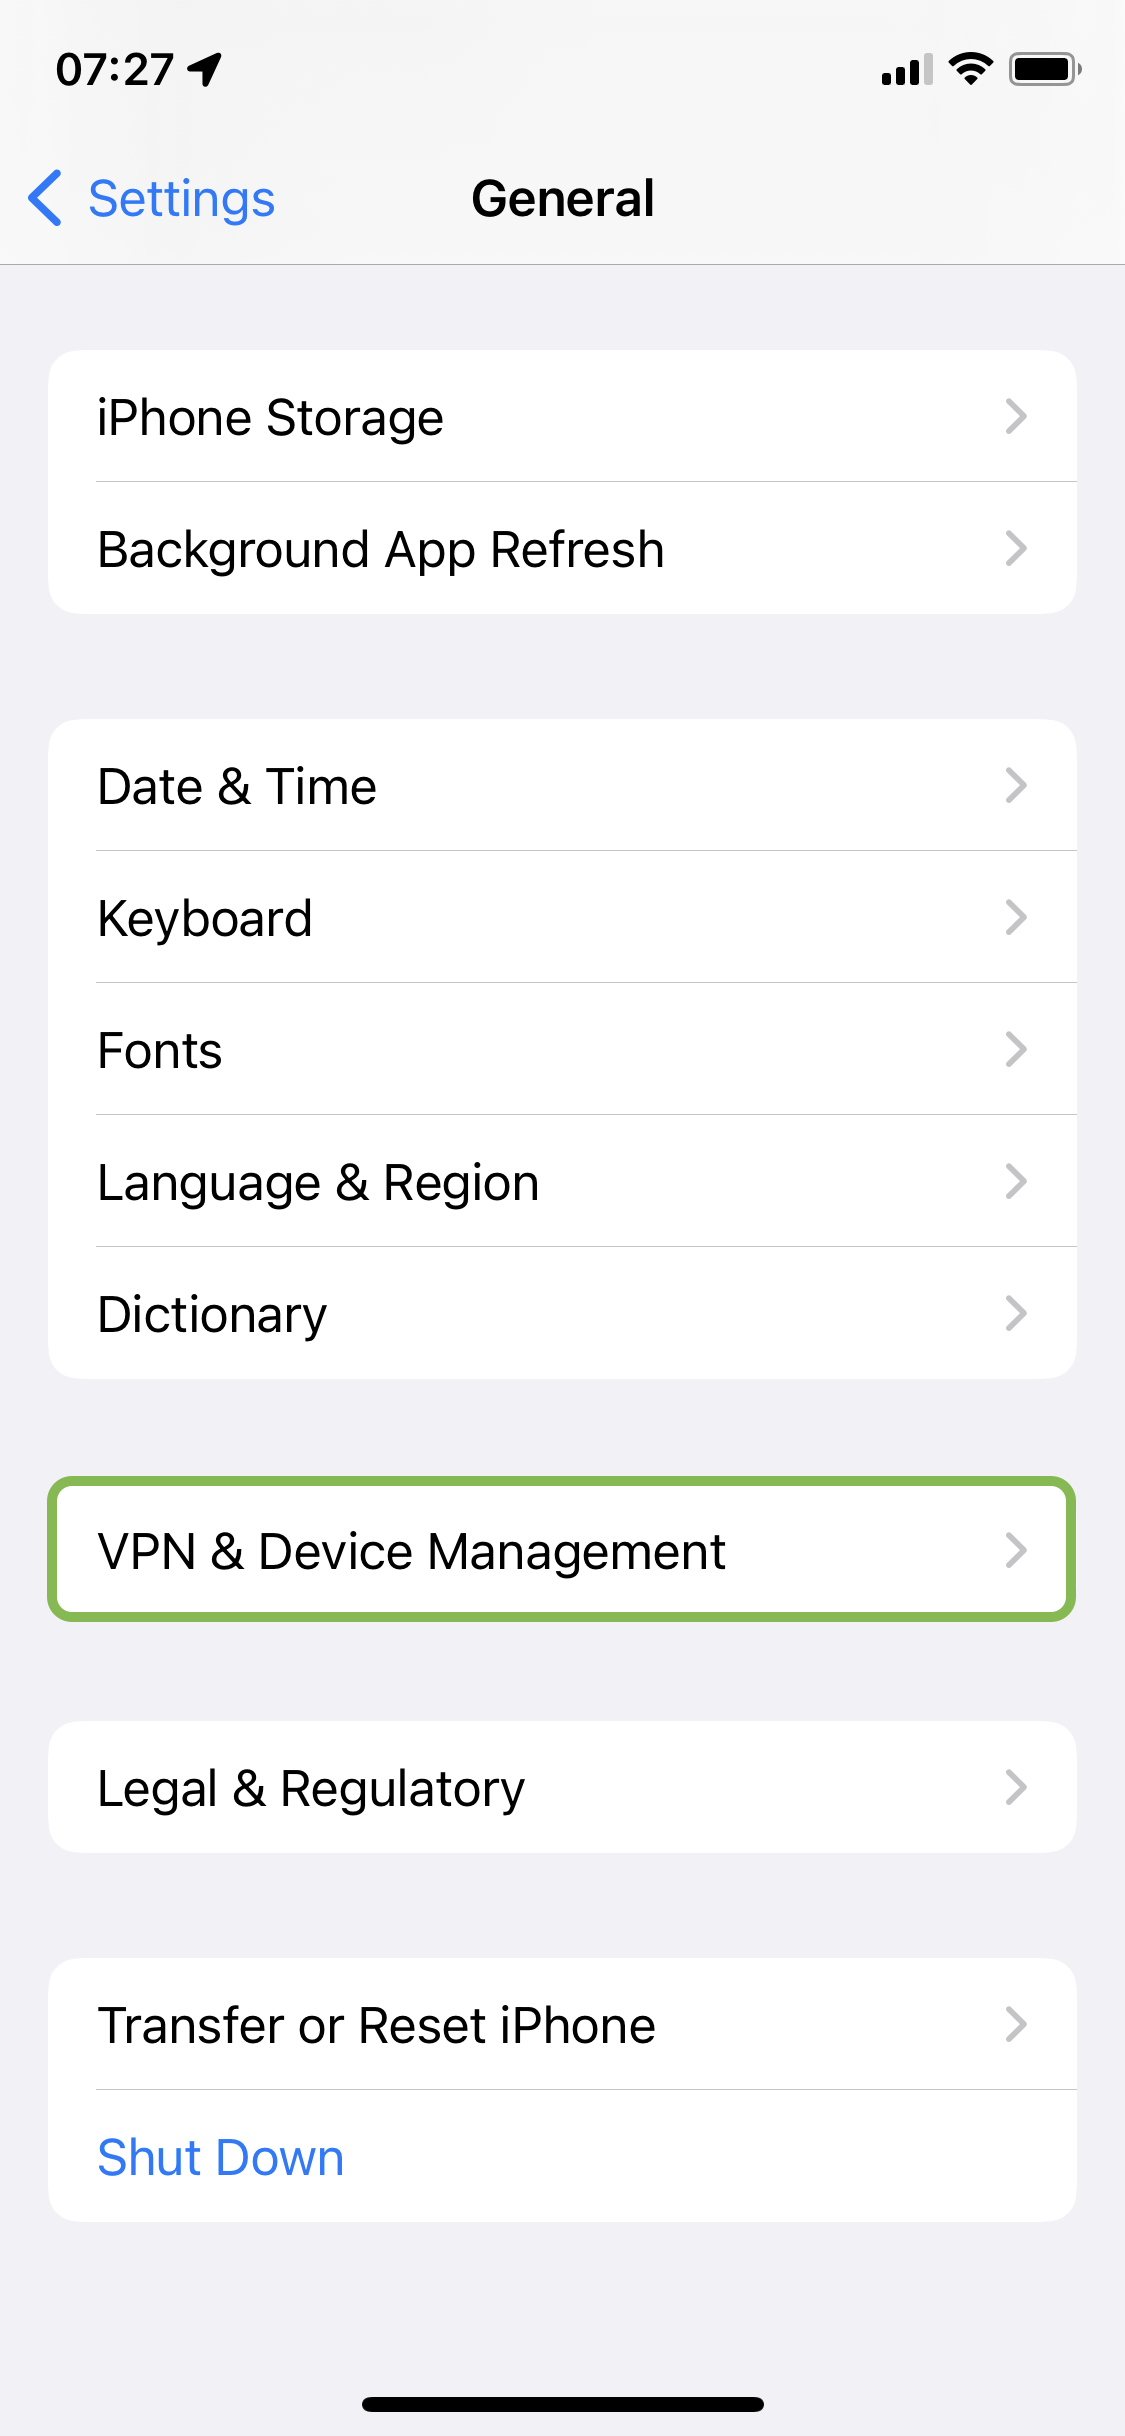
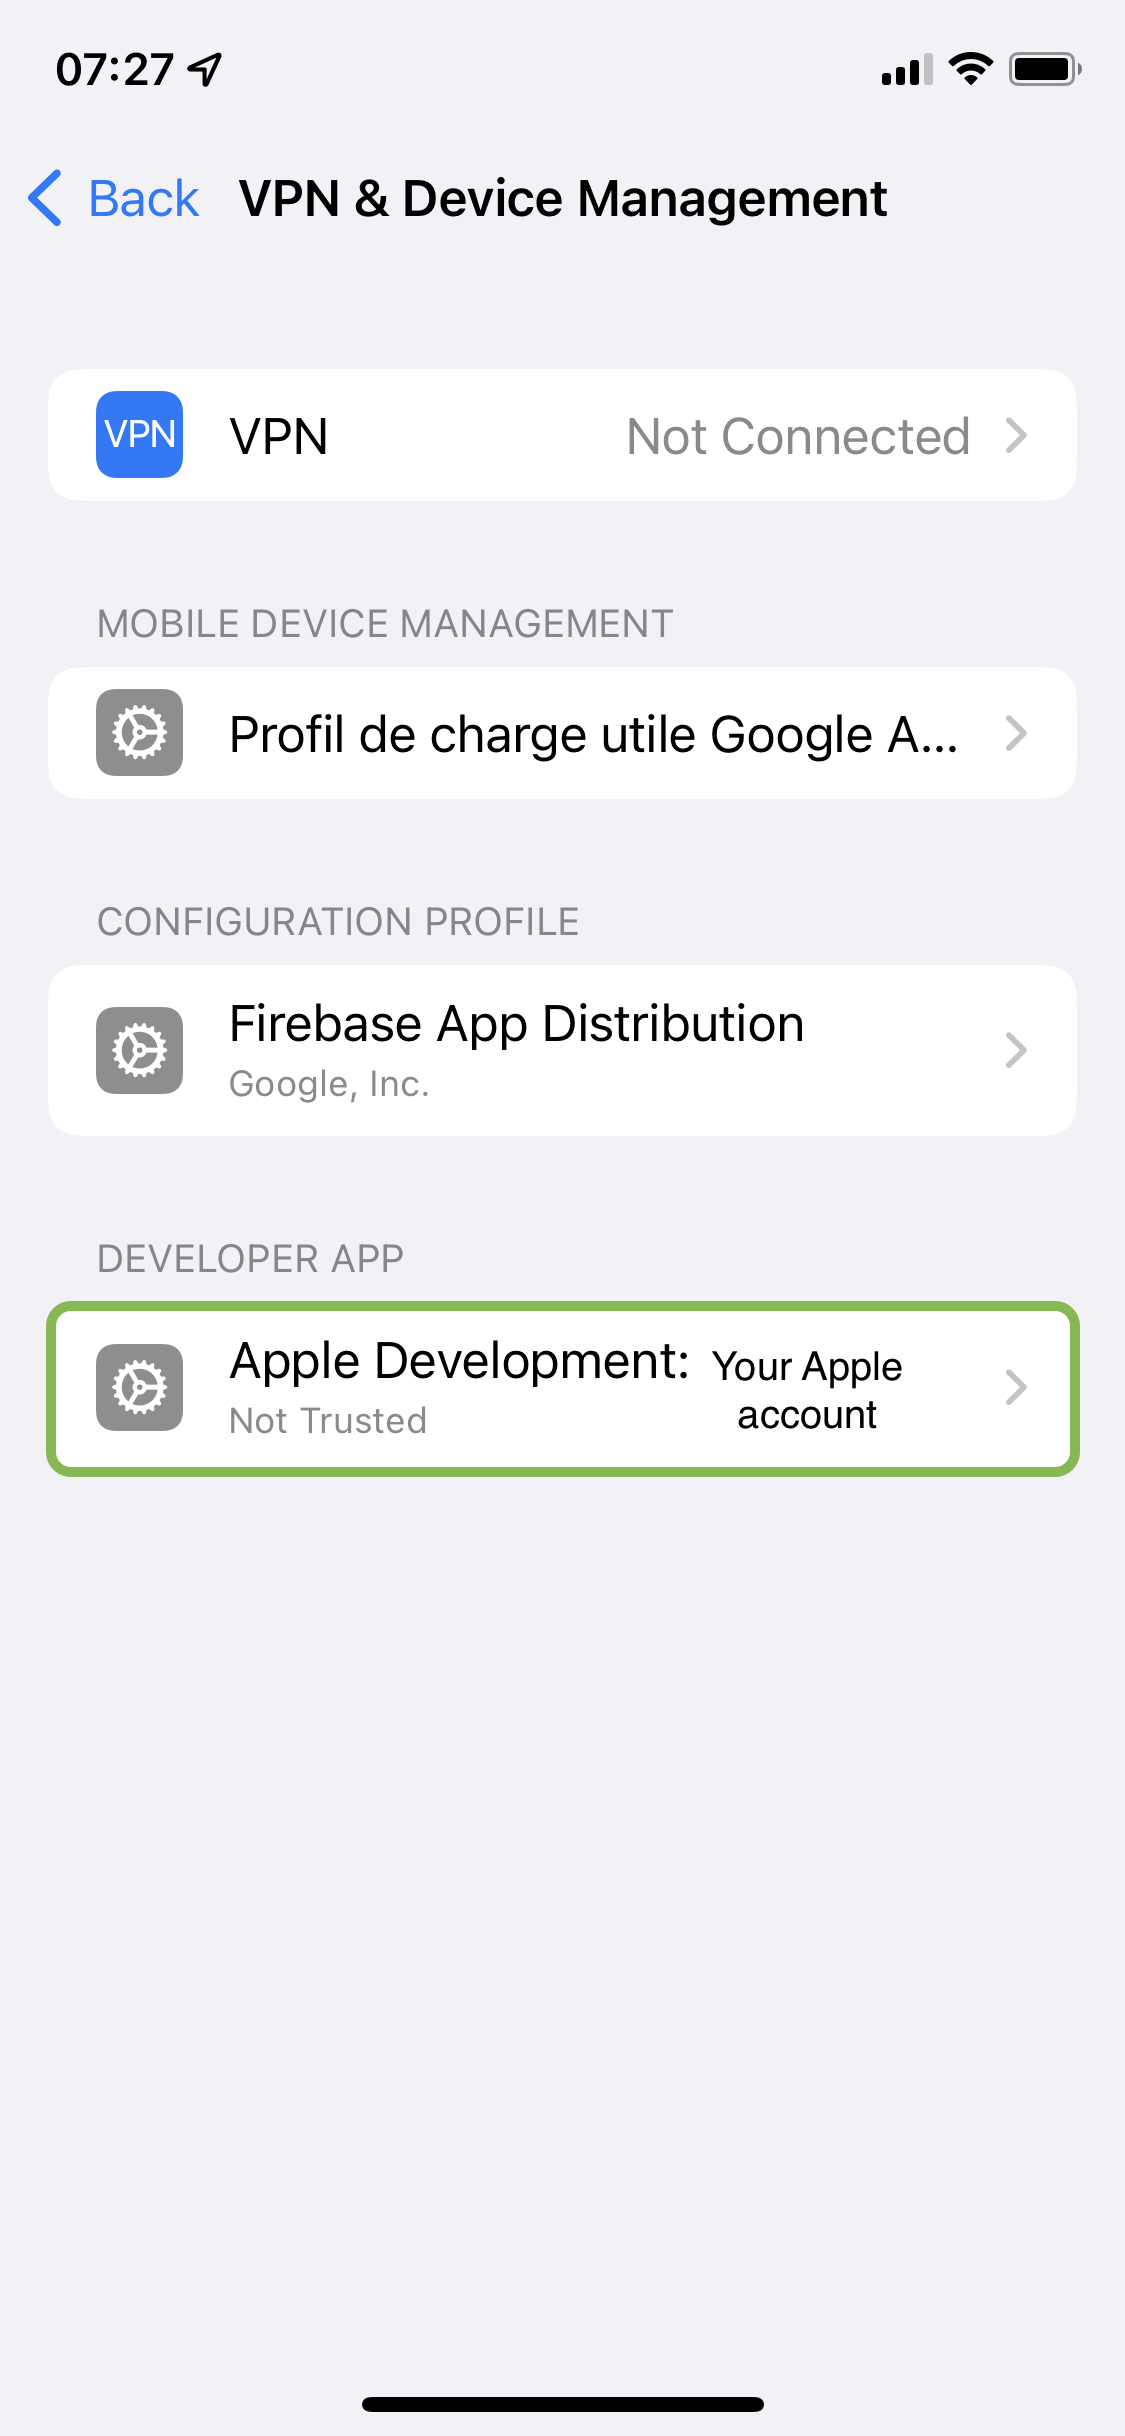
_Fig. 8: Build the Application_### Trusting the Apple DevelopmentTo accept the installation of the application.
You have to trust the "Apple development" on your device. Follow the steps below.\
\
\
\
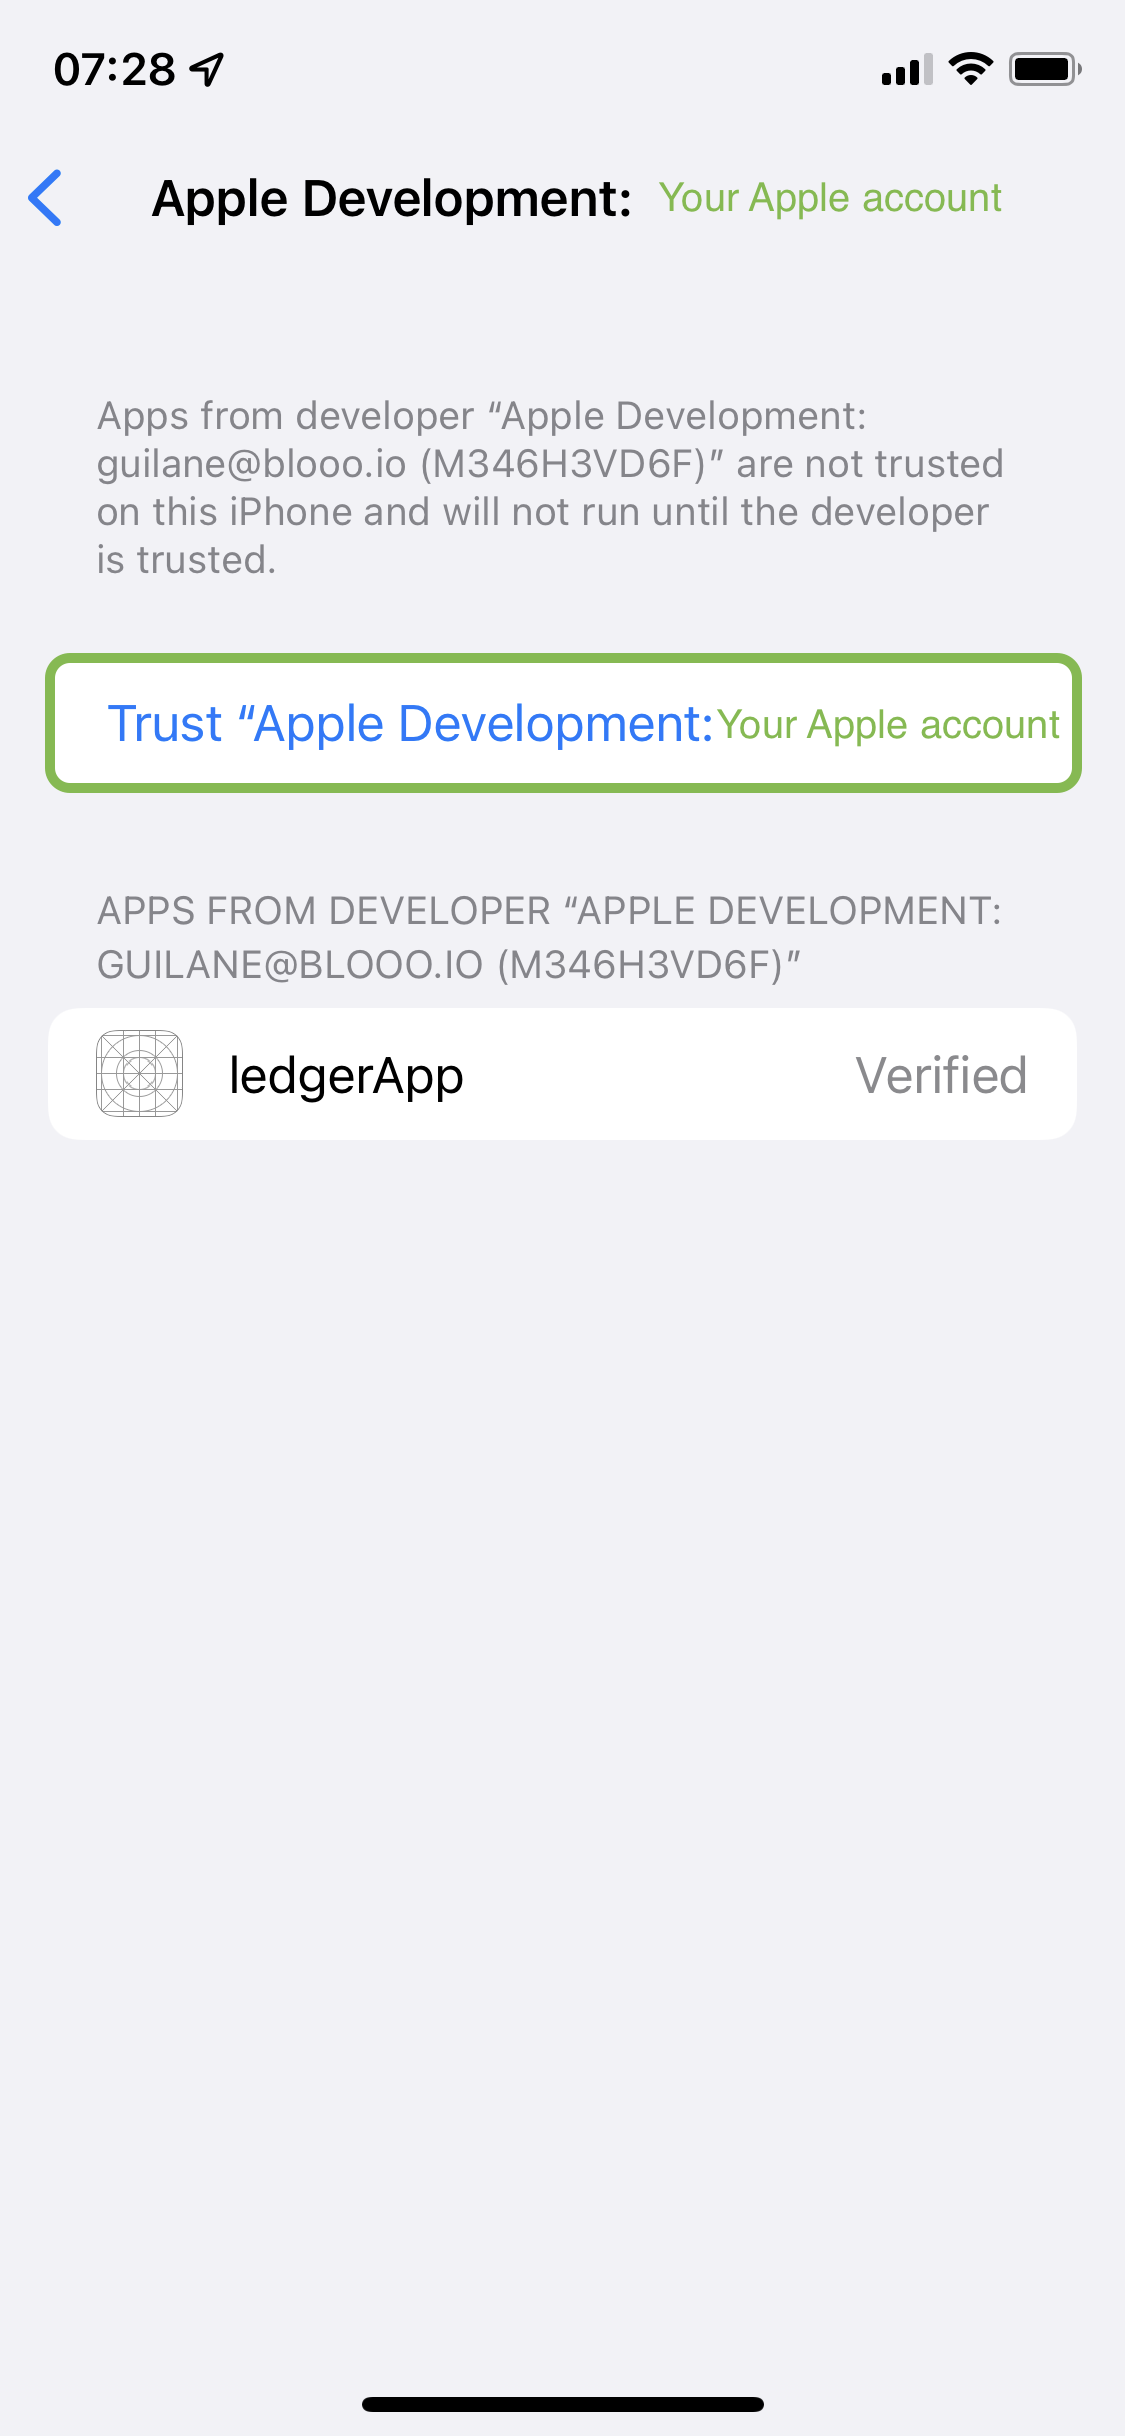\
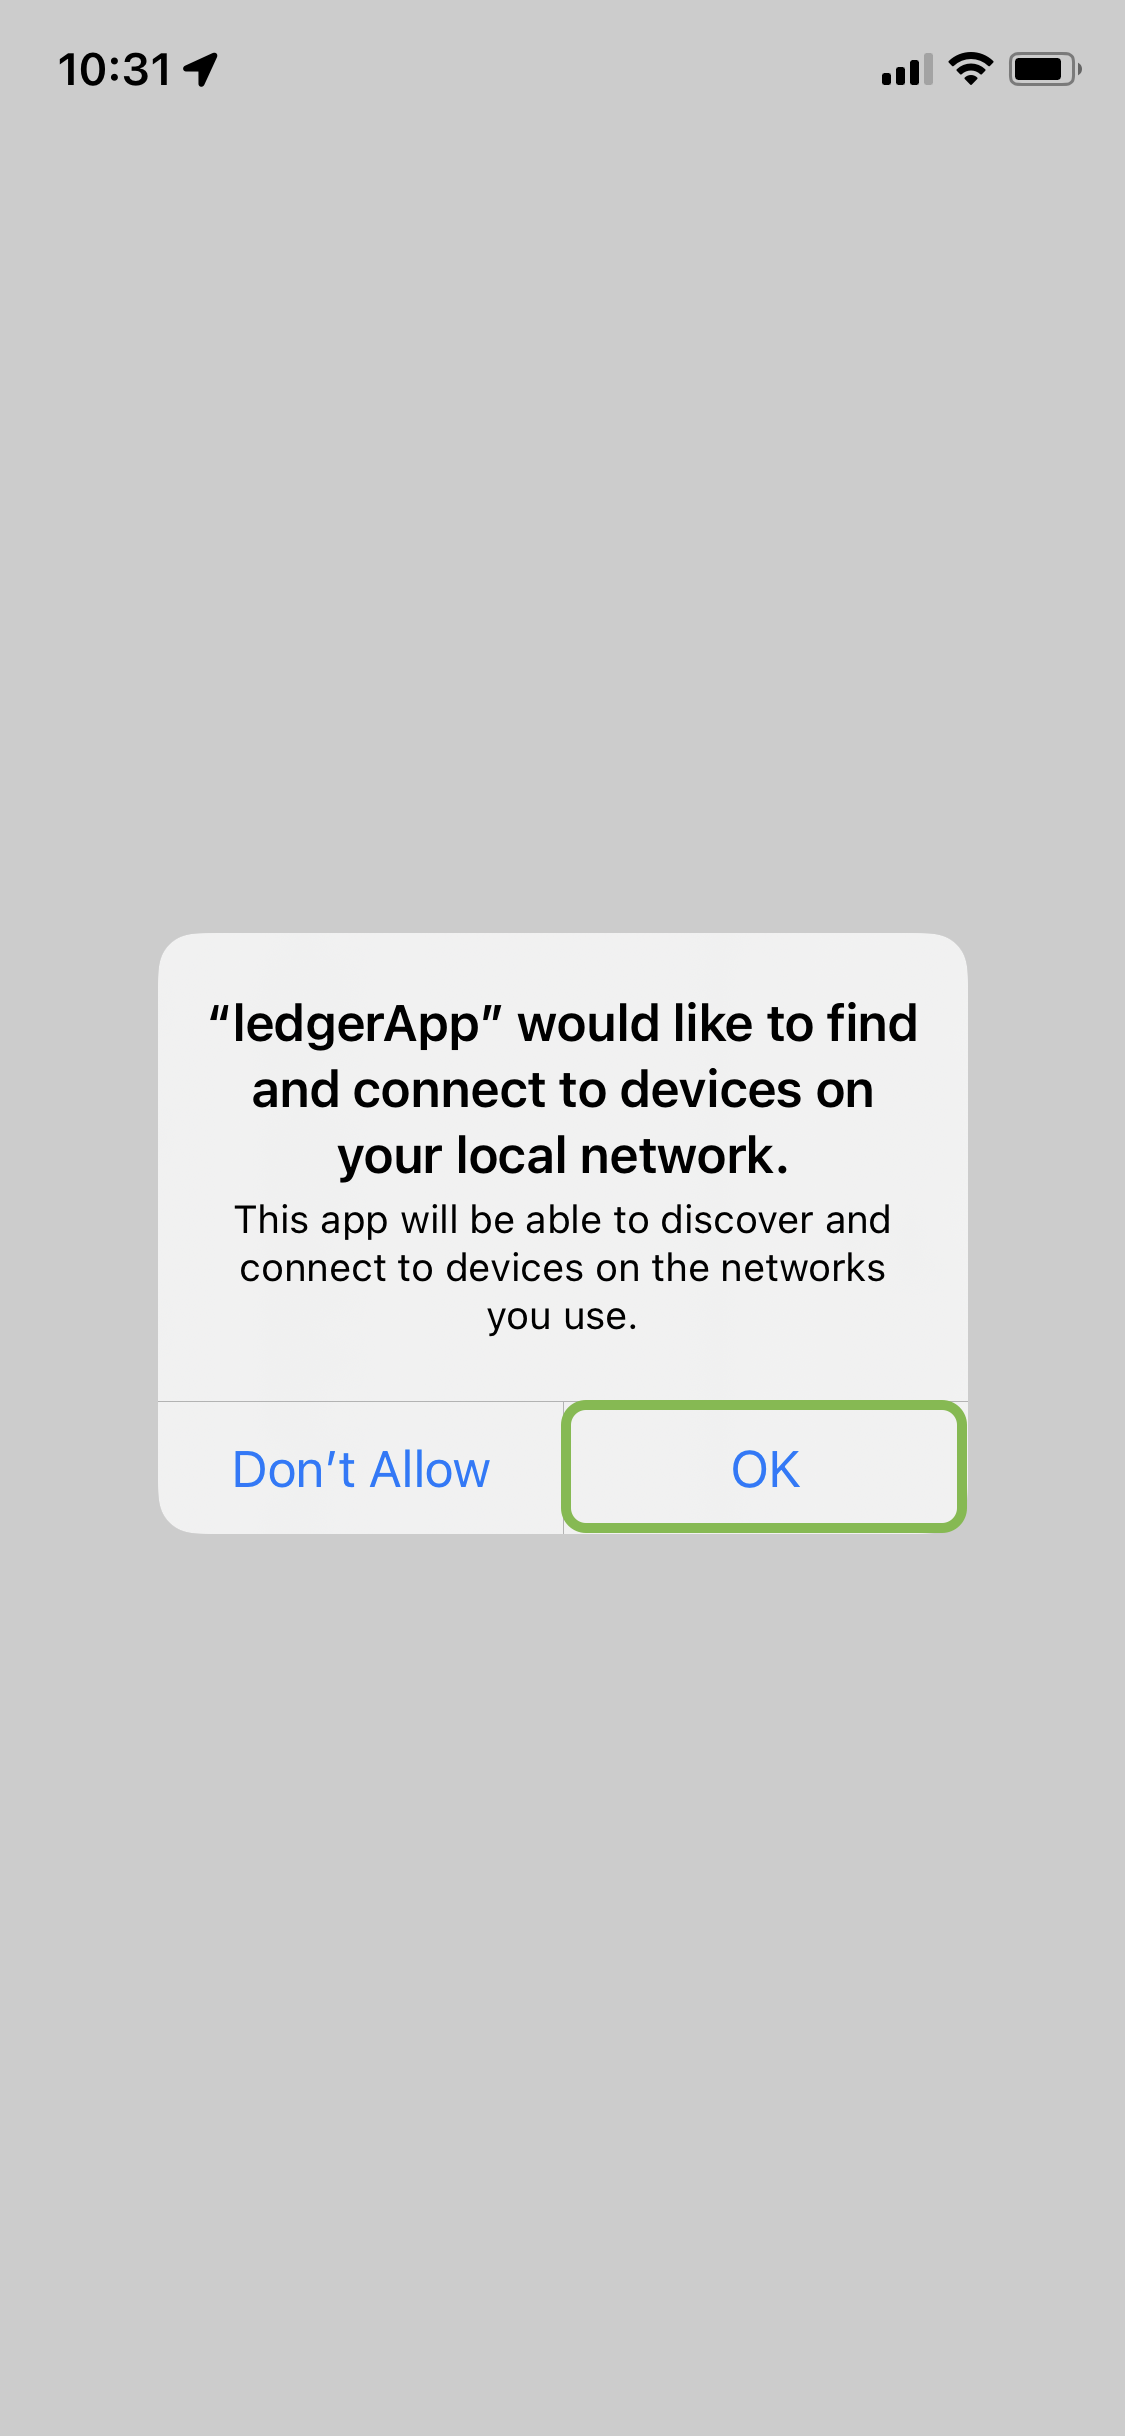
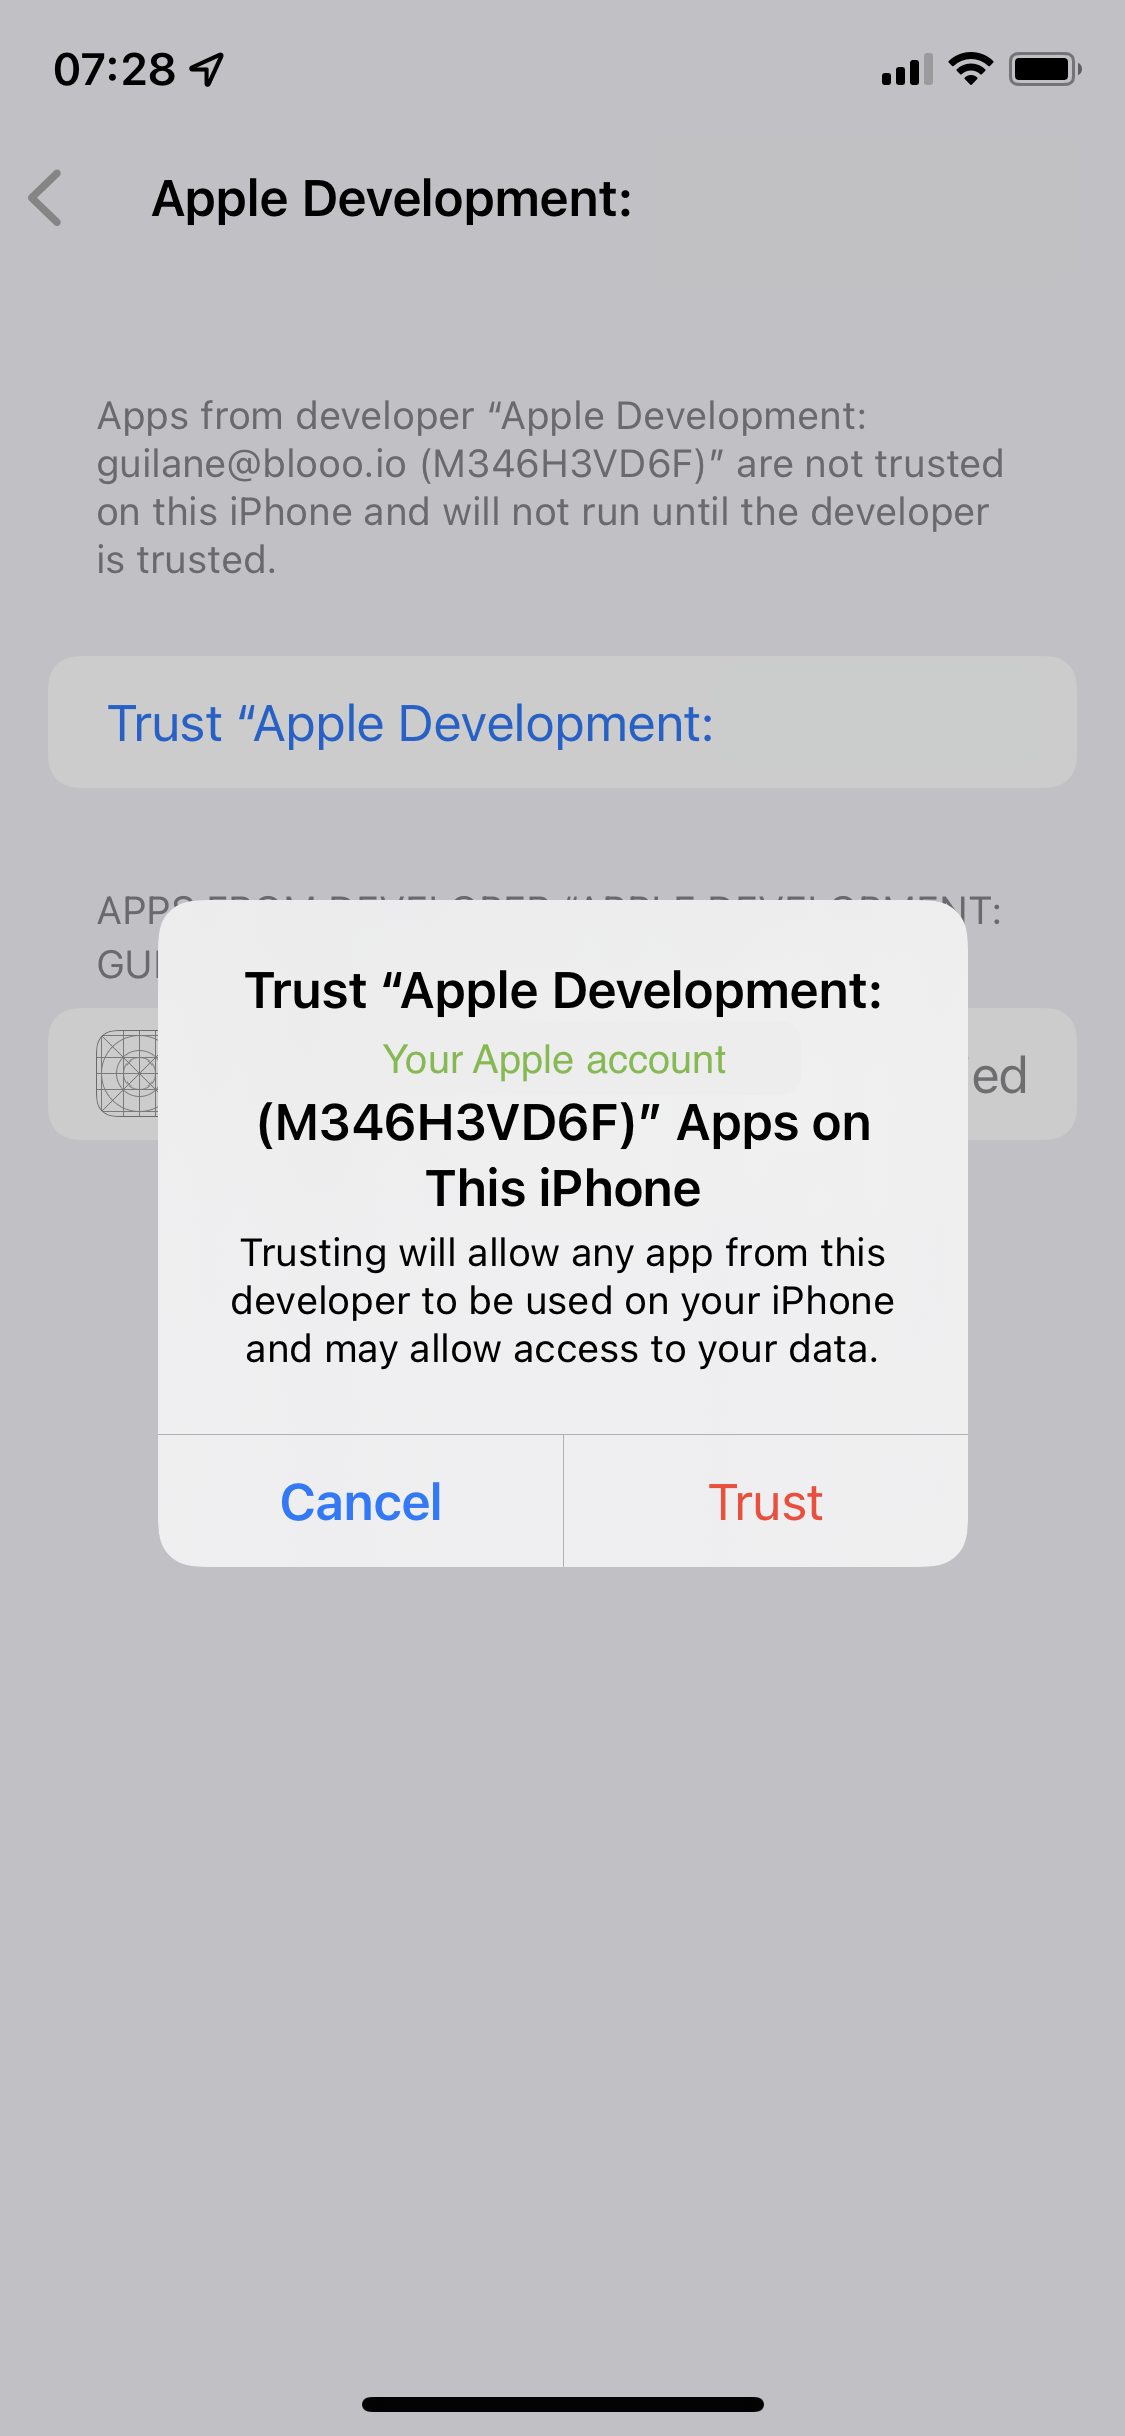Fig. 9: Trusting the Apple DevelopmentYou can finally test the application by launching it.### Launching the ApplicationWhen launching the application it will be displayed as shown below. You must have the Bluetooth and location activated.\
\
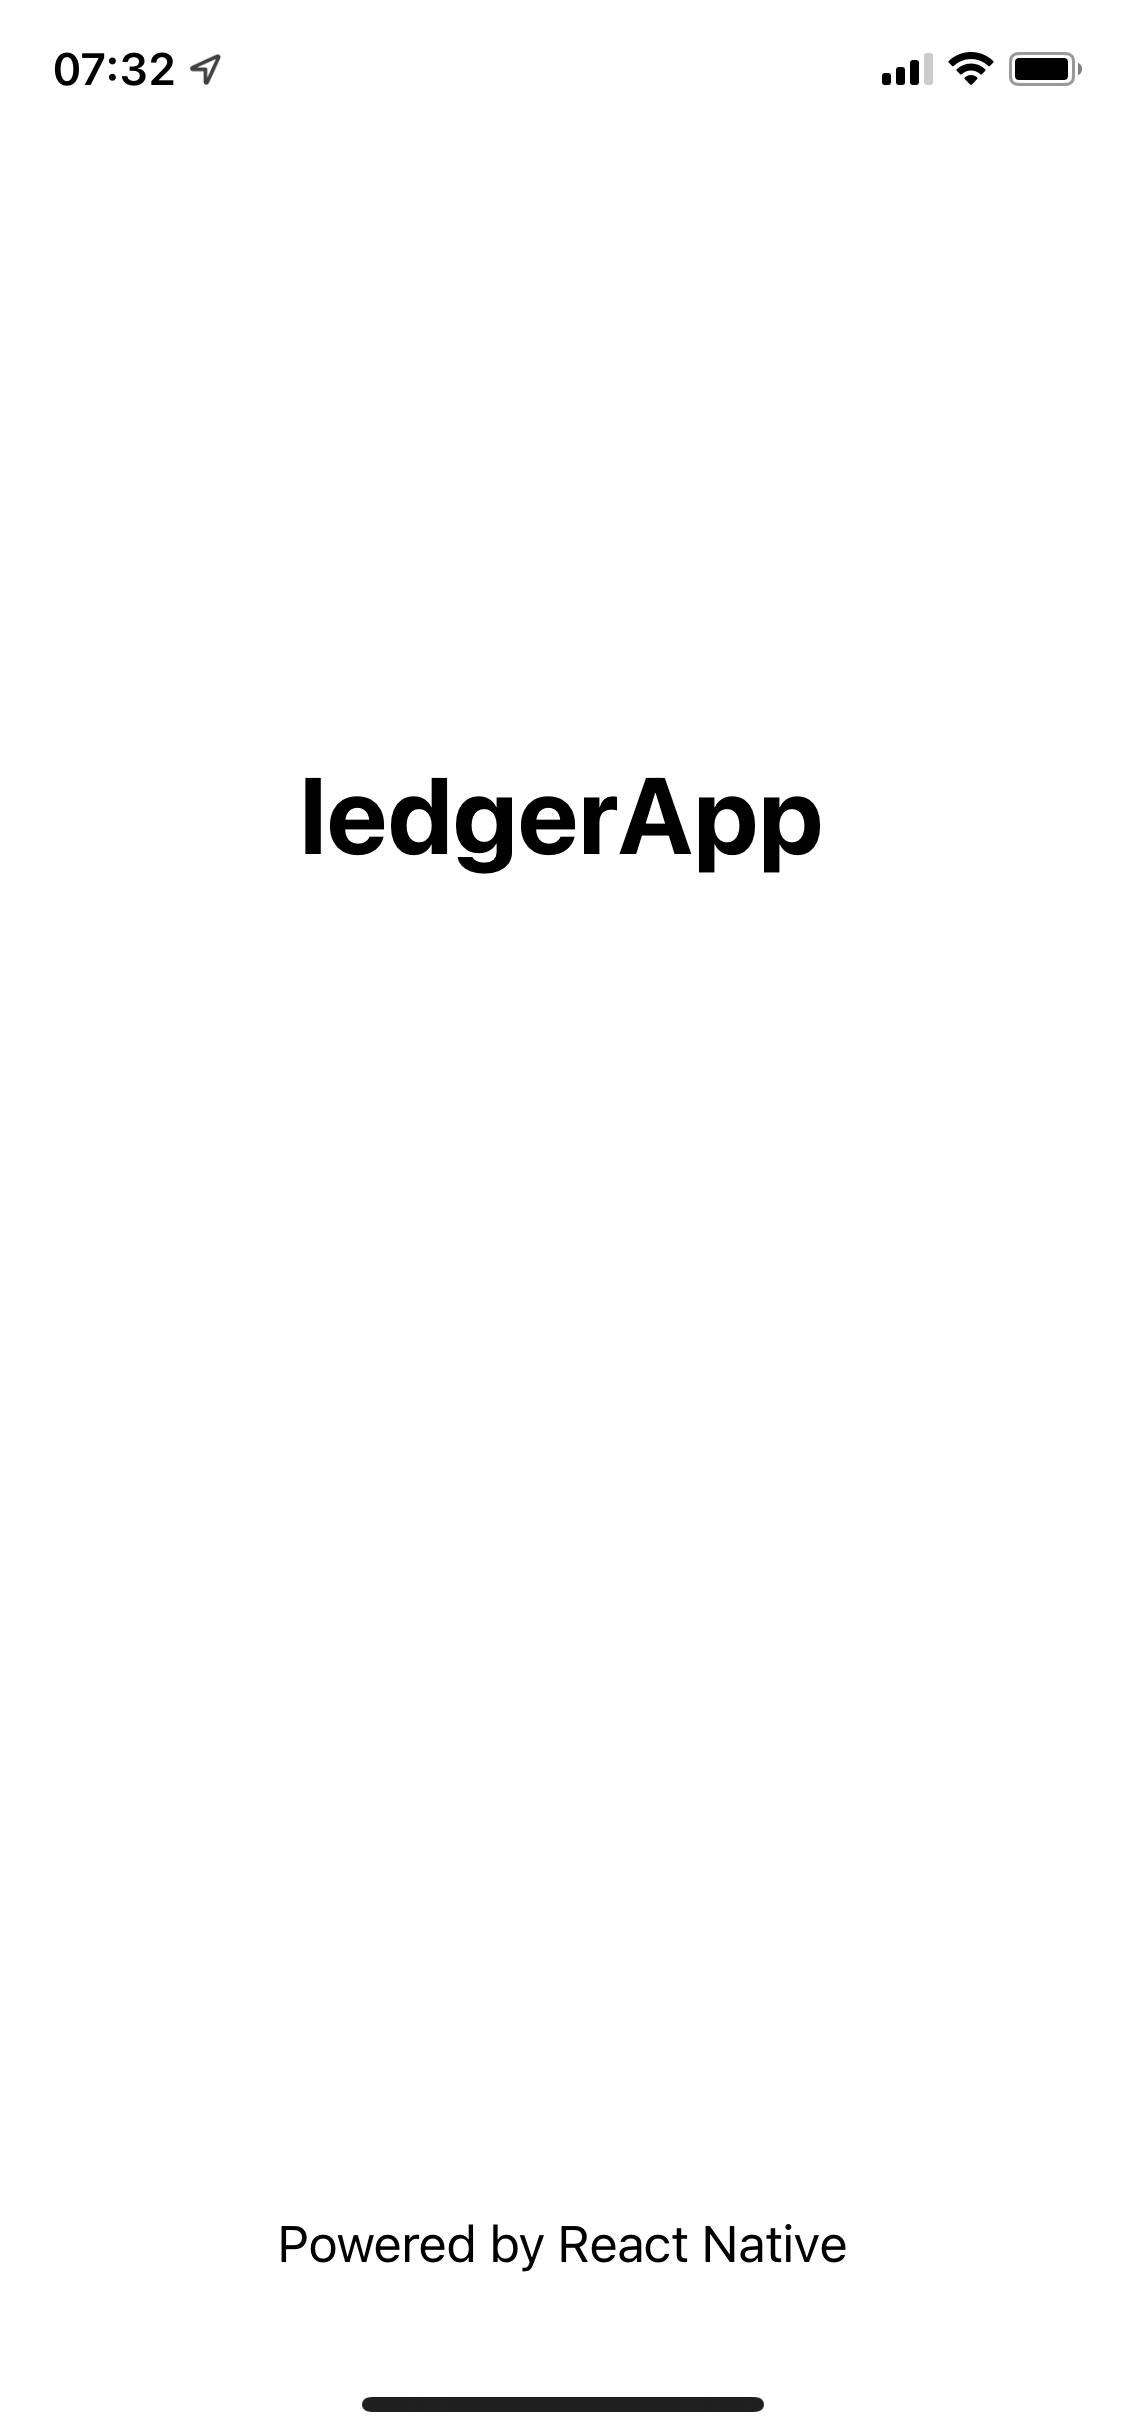\
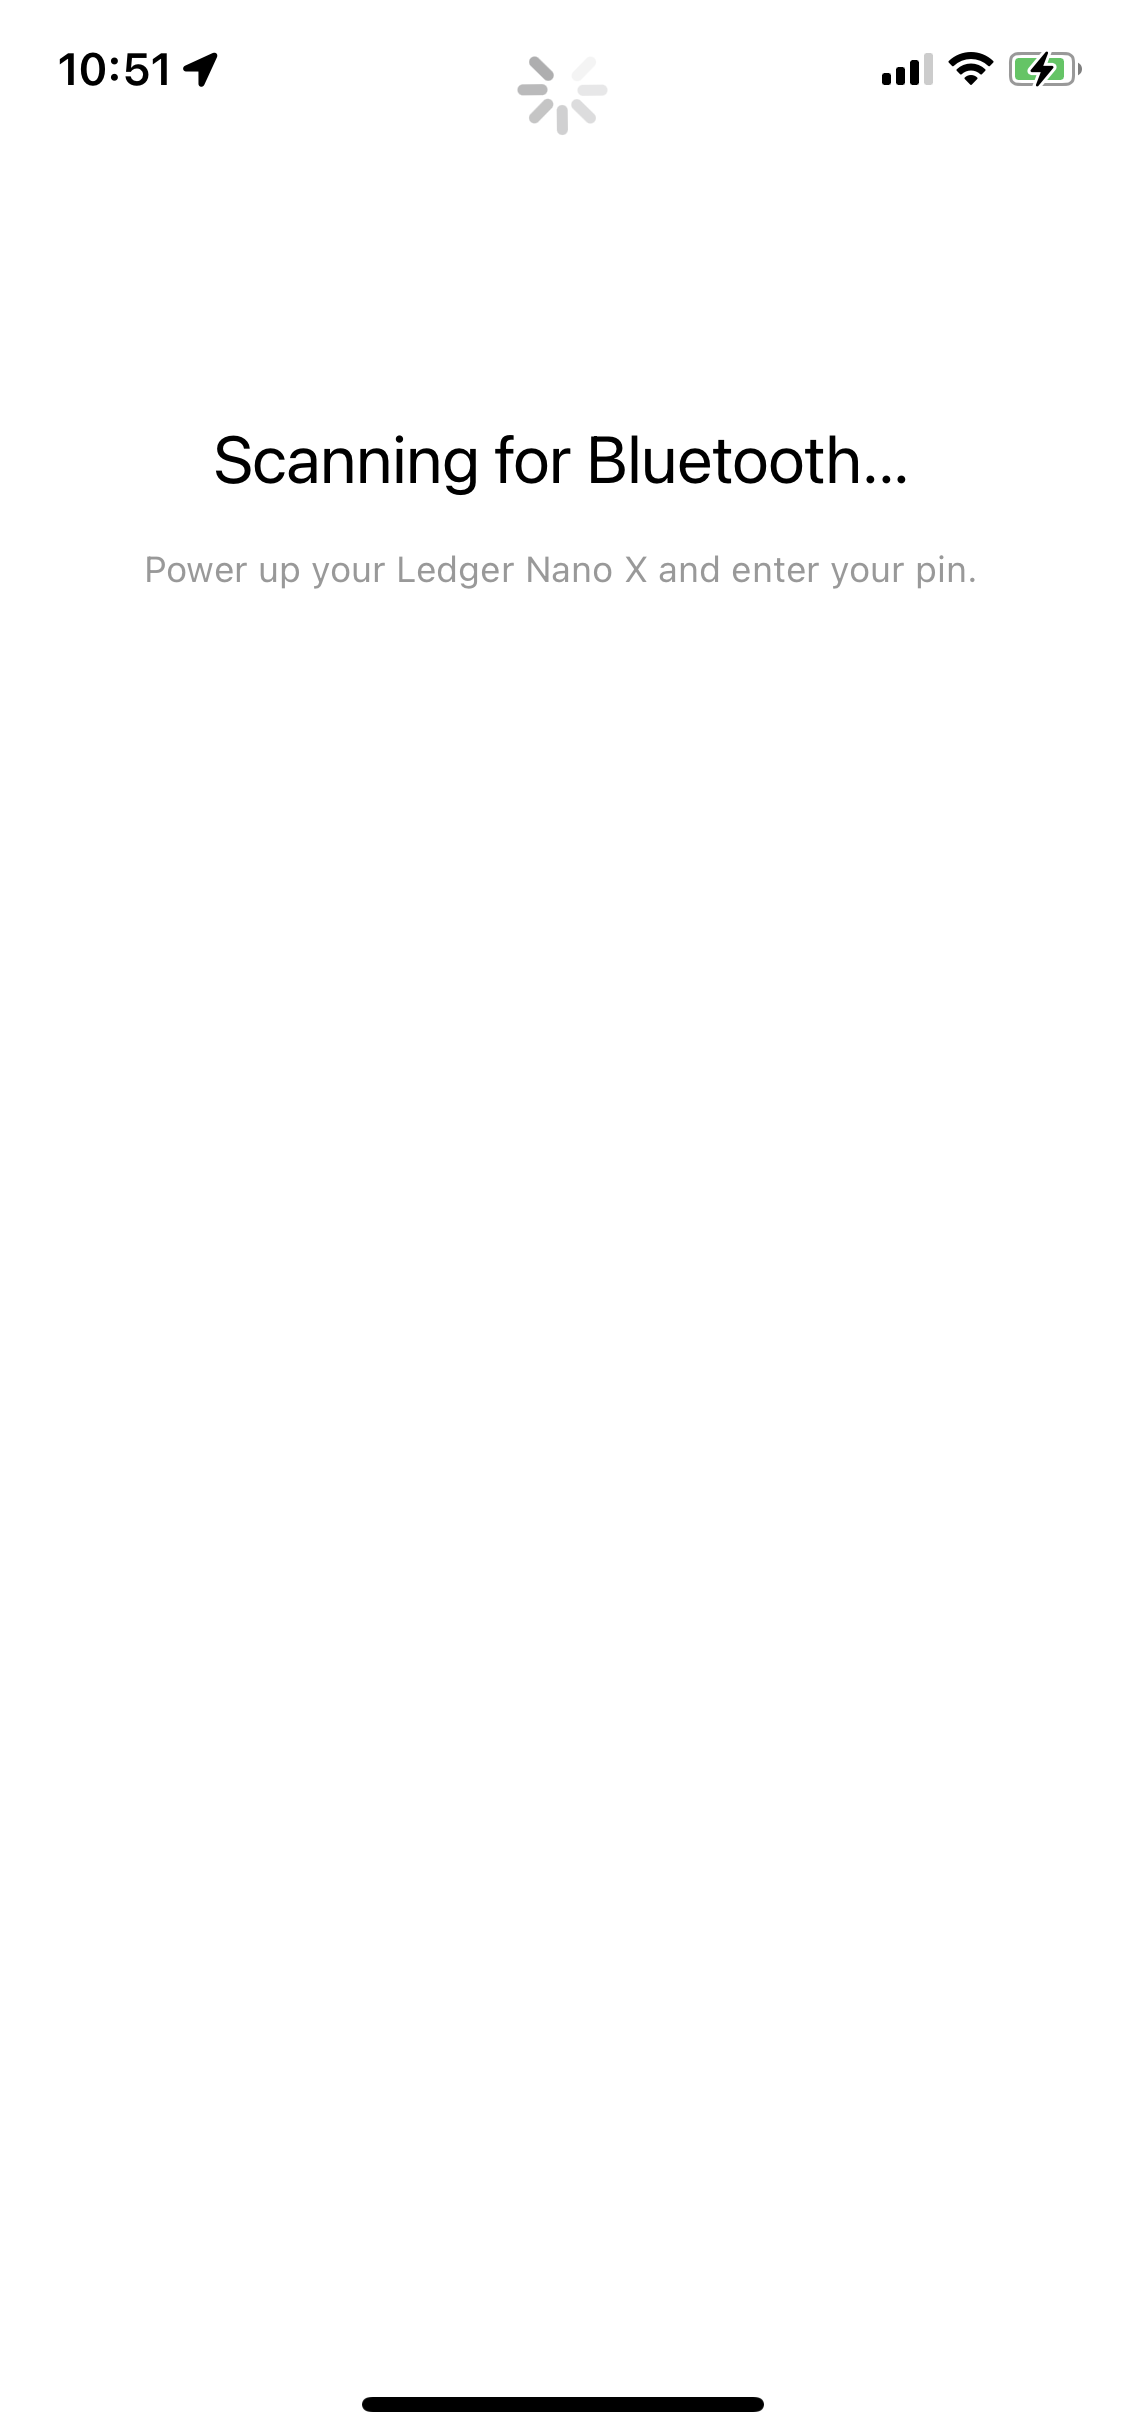Fig. 10: Launching the Application### Pairing the Ledger Nano XTo pair your Ledger Nano X you must unlock it.\
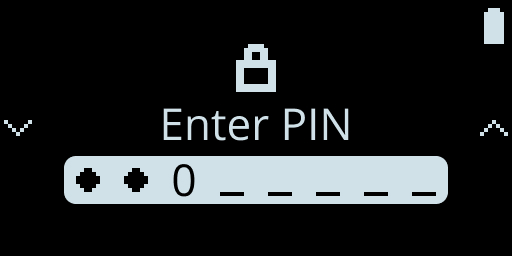Fig. 11: Nano Code PinPair the Ledger Nano X to your Apple device.\
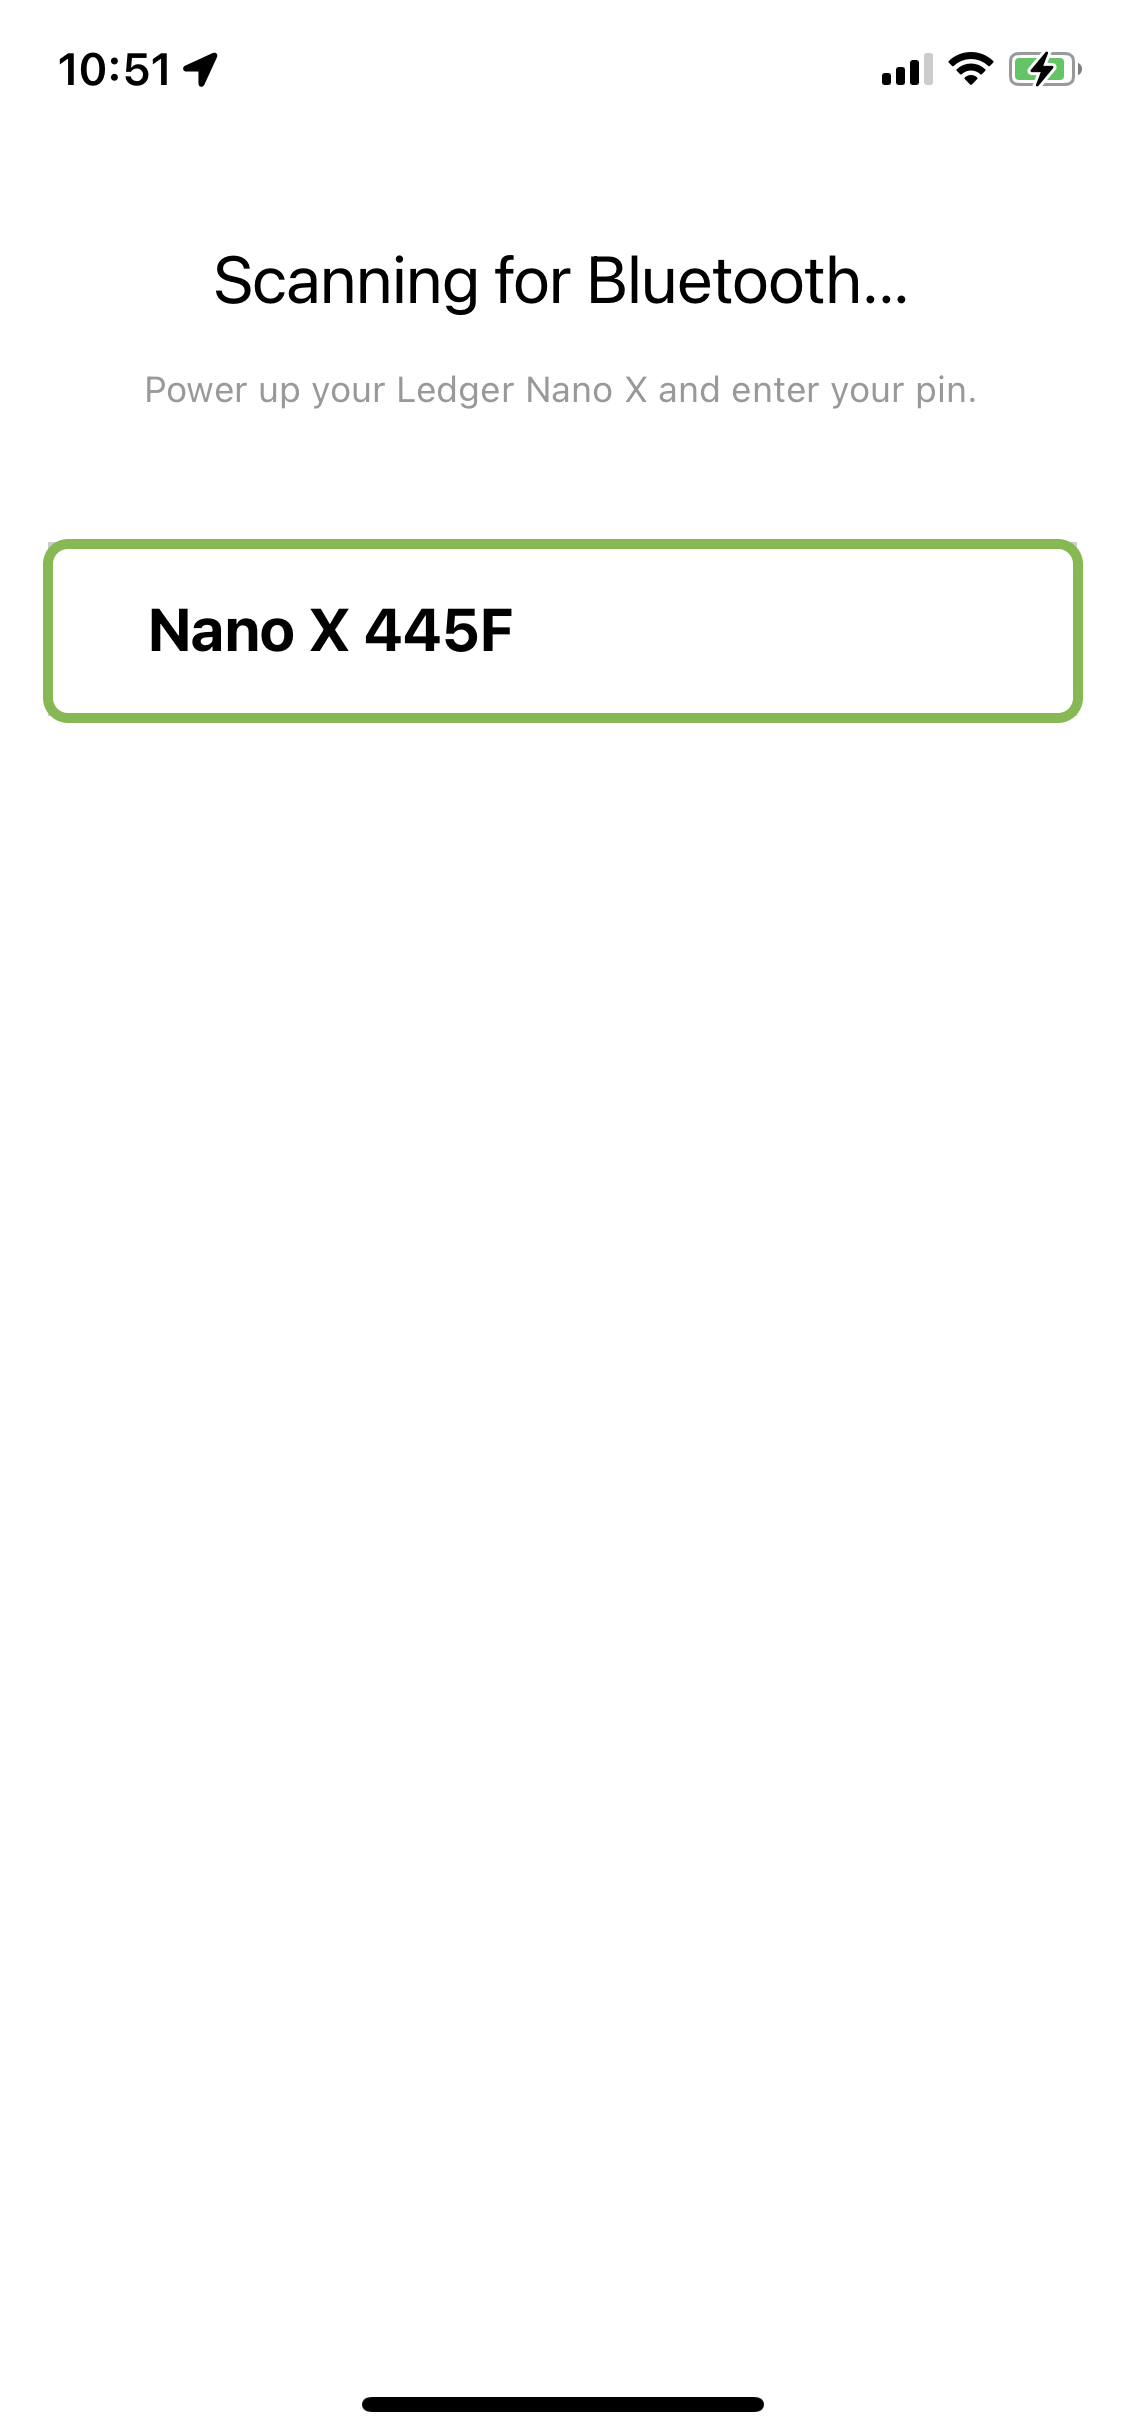\
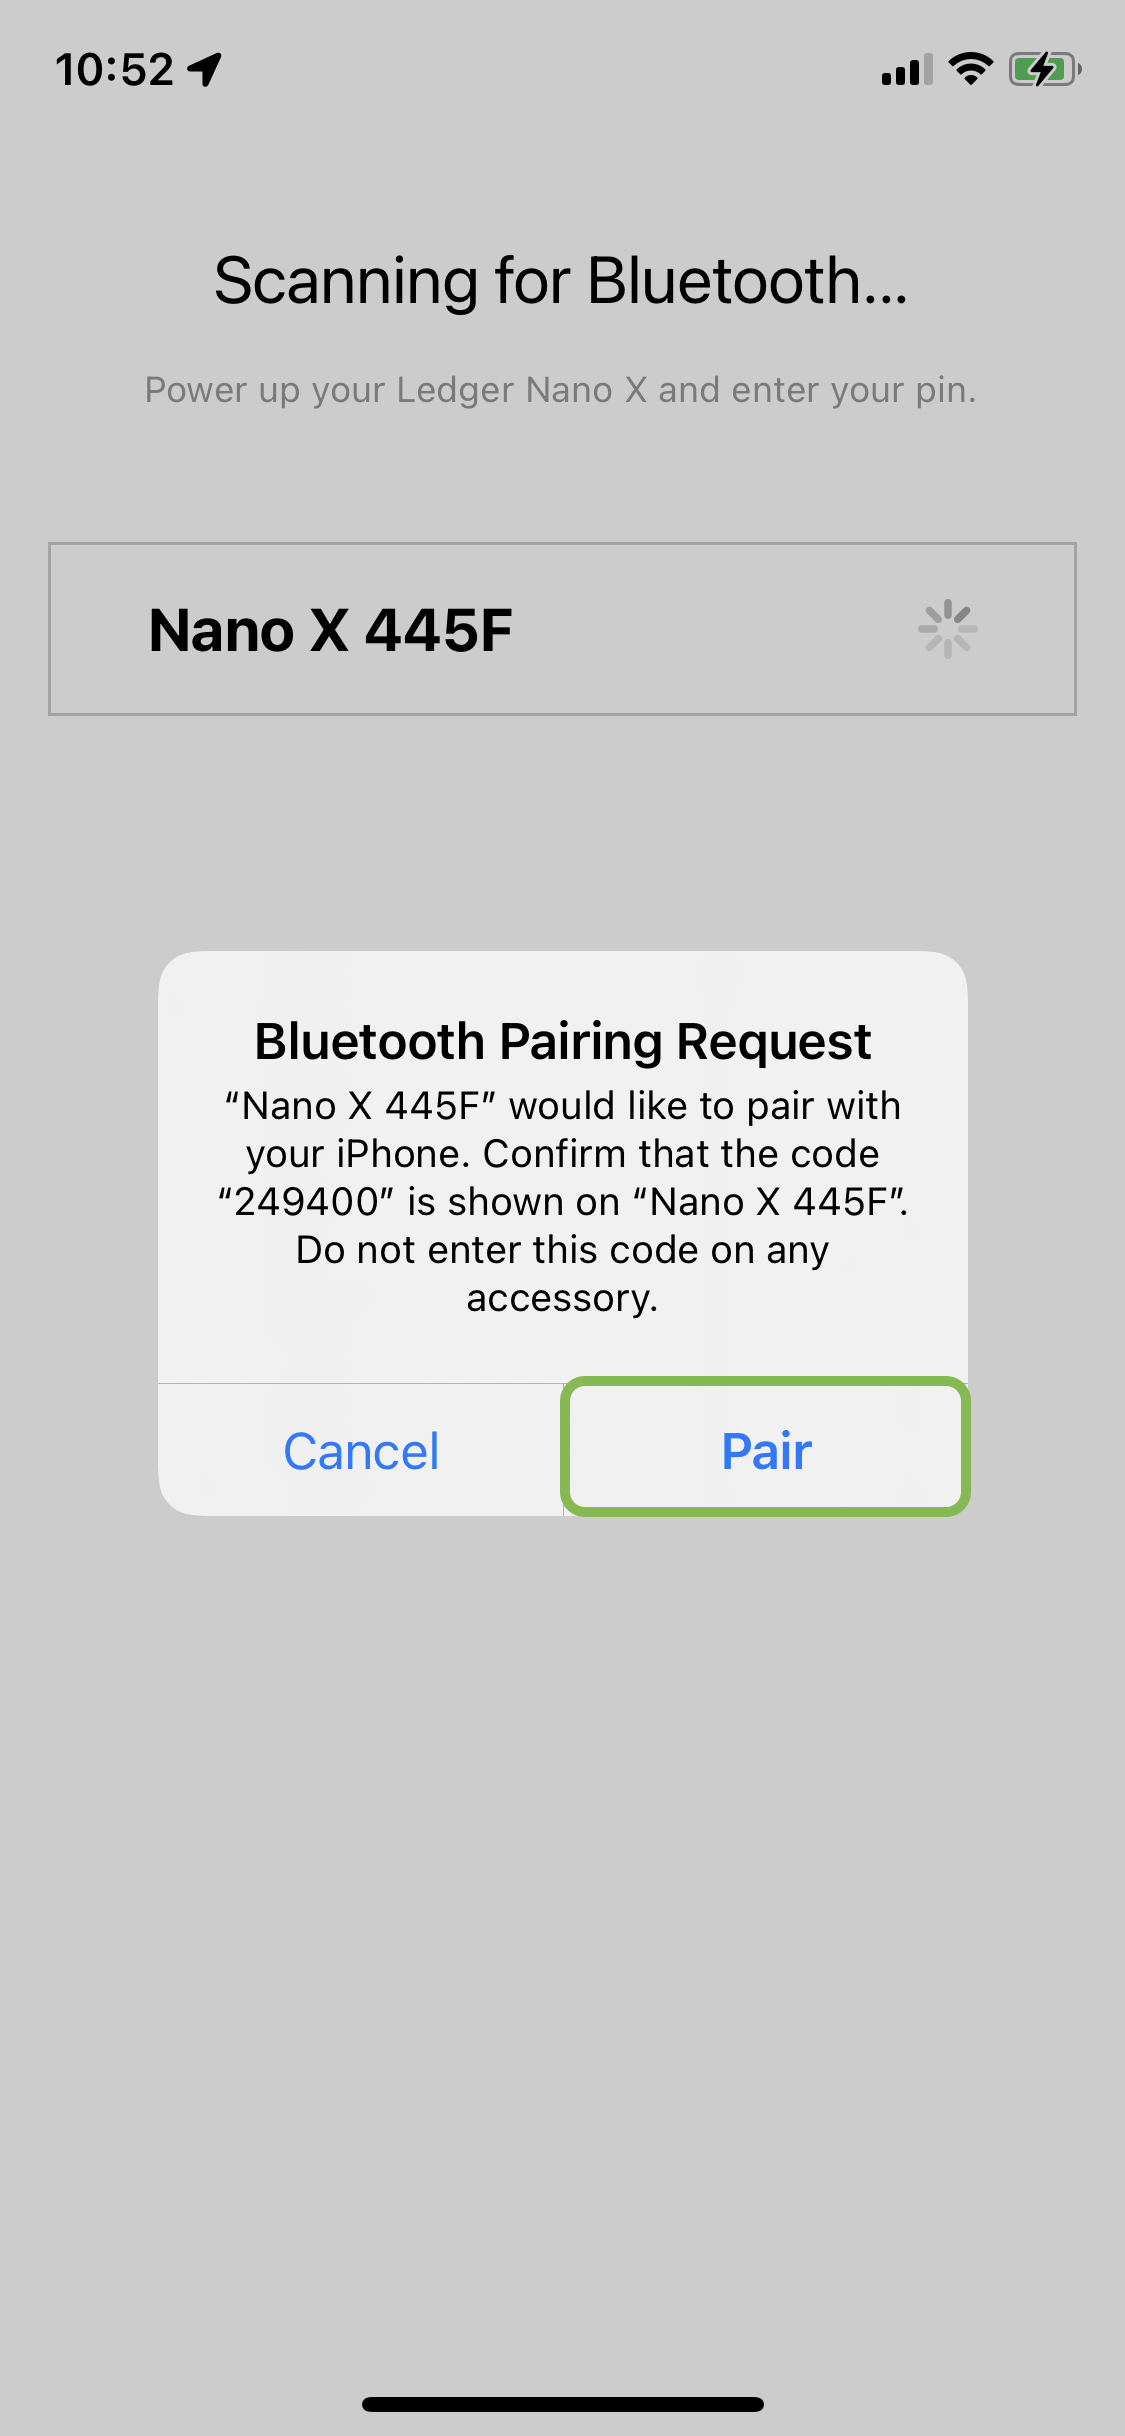Fig. 12: Pairing the Ledger Nano X### Pairing and Launching the Ethereum App on the Nano XThe pairing code displayed on your Ledger Nano X needs to be confirmed.\
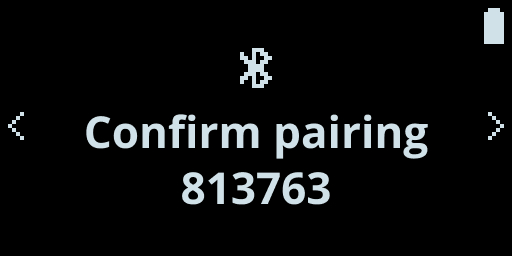Fig. 13: Confirm the pairing\
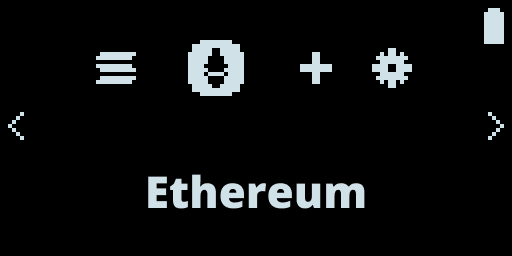Fig. 14: Embedded Application\
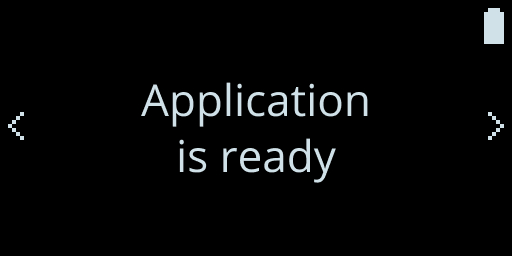Fig. 15: Nano Run ApplicationNow that the pairing is done, the Nano X is ready with the ethereum application.
If all goes well you must see the address of your ethereum account displayed.\
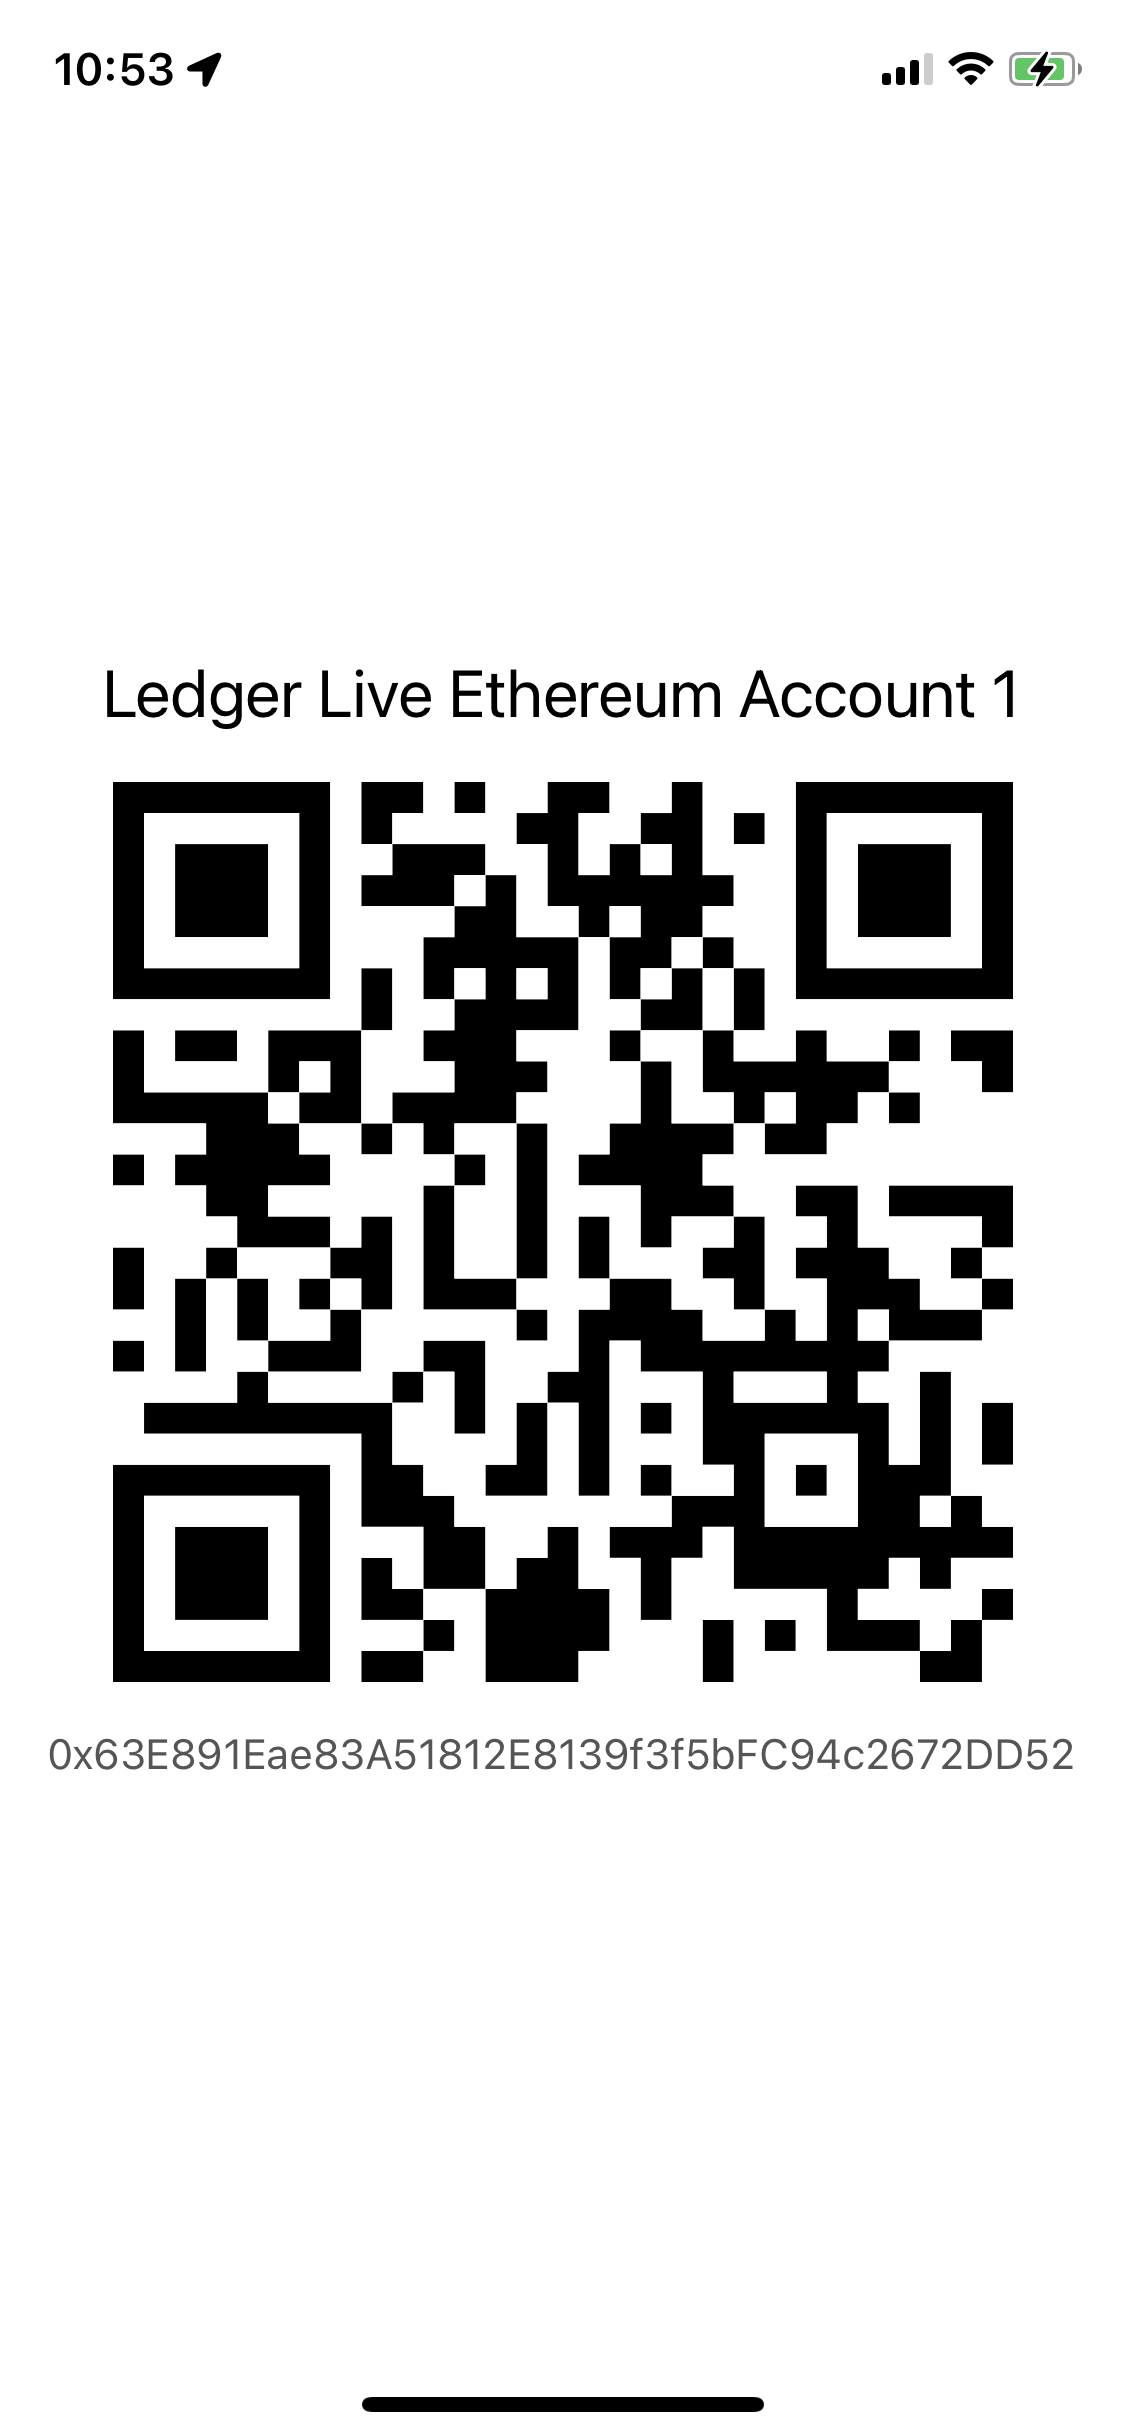Fig. 16: Address Account Displayed on Smartphone### Verify the AddressFor security purposes, we display on your Nano X the same ethereum address for you to confirm.\
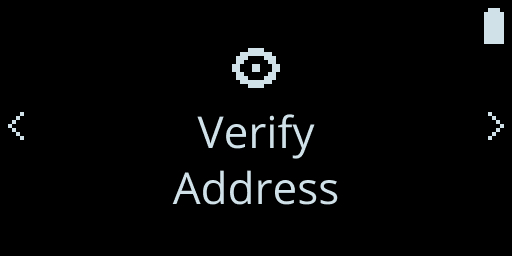Fig. 17: Nano Verify Screen\
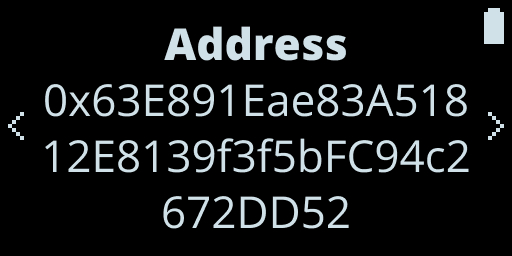Fig. 18: Nano Verify Address Screen\
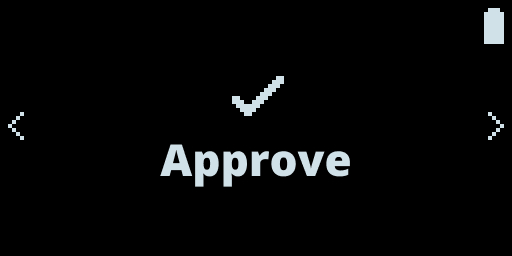Fig. 19: Embedded Approve ScreenCongratulations you have successfully built your first iOS Bluetooth application connected to your Ledger!