# Call a Smart Contract## IntroductionIn this section, we will guide you through the creation of an application that will call a smart contract to read and write.## Tutorial PrerequisitesBefore starting, make sure you have gone through the [prerequisites](../info#prerequisites).### Receive Ether token in your Ledger Nano Ethereum Sepolia account* Create an Ethereum Sepolia account in Ledger Live
* Send Sepolia Eth to your account with [Infura faucet](https://www.infura.io/faucet/sepolia). You will need to create an account that will be useful later for the API key.
_Fig. 1: Sepolia Ethereum Faucet_## Web App Bluetooth (only Nano X)The Ledger Nano S and S Plus do not have the Bluetooth functionality. This tutorial will only work with a Ledger Nano X.Please be aware that the Bluetooth implementation is only supported by a few browsers.
You can check the [browser support](https://caniuse.com/web-bluetooth) for the Web Bluetooth transport.### Project InitializationThe app is build with React, which is a frontend Javascript framework.First, open a terminal and create a new project. For this tutorial the project will be named "e2e-tutorial-contract".
Run:```console copy
npx create-react-app e2e-tutorial-contract
cd e2e-tutorial-contract
```Open the folder in an text editor.Run:```console copy
mkdir pages
mkdir styles
touch ./ConnectLedger.js
touch ./SmartContract.js
touch ./ethereum.js
touch ./styles/global.css
touch ./styles/Home.module.css
mv src/index.js pages
mv src/App.js ./
rm -r src
```The folder will contain these files:
_Fig. 1: Folder of the Application_To implement the Ledger connexion you will only modify "App.js", "index.js", "ConnectLedger.js”,"SmartContract.js", and ethereum.js”### Code Implementation#### App.jsIn App.js copy-paste the following code:```javascript copy
import React, { useState } from "react";
import ConnectLedger from "./ConnectLedger.js";
import SmartContract from "./SmartContract.js";
function App() {
const [transport, setTransport] = useState(undefined);
const [eth, setEth] = useState(undefined);
const [address, setAddress] = useState(undefined);
const saveInfo = (info) => {
setAddress(info.address);
setEth(info.eth);
setTransport(info.transport);
};
return (
{!transport ? (
saveInfo(info)}>
) : (
)}
);
}
export default App;
```#### ConnectLedger.jsIn ConnectLedger.js, copy-paste the following code:```javascript copy
import React from "react";
import TransportWebBLE from "@ledgerhq/hw-transport-web-ble";
import Eth from "@ledgerhq/hw-app-eth";
function ConnectLedger({ onTransport }) {
const connectLedger = async () => {
const transport = await TransportWebBLE.create();
const eth = new Eth(transport);
const { address } = await eth.getAddress("44'/60'/0'/0/0", false);
onTransport({ address, eth, transport });
};
return (
);
}
export default ConnectLedger;
```#### SmartContract.jsIn "SmartContract.js", copy-paste the following code and replace `{YOUR_INFURA_APIKEY}` by the API key you will find on your Infura account:```javascript copy
import React, { useState } from "react";
import getBlockchain from "./ethereum.js";
import { ethers } from "ethers";
import { ledgerService } from "@ledgerhq/hw-app-eth";
function SmartContract({ eth, address }) {
const [simpleStorage, setSimpleStorage] = useState(undefined);
const [data, setData] = useState(undefined);
const [provider, setProvider] = useState(undefined);
const [url, setUrl] = useState(undefined);
const smartContractRead = async () => {
const provider = new ethers.providers.JsonRpcProvider(
"https://sepolia.infura.io/v3/{YOUR_INFURA_APIKEY}",
);
const { simpleStorage } = await getBlockchain(provider);
console.log(simpleStorage);
const data = await simpleStorage.readData();
setProvider(provider);
setSimpleStorage(simpleStorage);
setData(data);
};
const updateData = async (e) => {
e.preventDefault();
const dataInput = e.target.elements[0].value;
console.log(simpleStorage);
const { data } =
await simpleStorage.populateTransaction["updateData(uint256)"](dataInput);
const unsignedTx = {
to: simpleStorage.address,
gasPrice: (await provider.getGasPrice())._hex,
gasLimit: ethers.utils.hexlify(100000),
nonce: await provider.getTransactionCount(address, "latest"),
chainId: 11155111,
data: data,
};
console.log(unsignedTx);
const defaultLoadConfig = {
nftExplorerBaseURL: "https://nft.api.live.ledger.com/v1/ethereum",
pluginBaseURL: "https://cdn.live.ledger.com",
extraPlugins: null,
cryptoassetsBaseURL: "https://cdn.live.ledger.com/cryptoassets",
};
const serializedTx = ethers.utils.serializeTransaction(unsignedTx).slice(2);
const resolution = await ledgerService.resolveTransaction(
serializedTx,
defaultLoadConfig,
{},
);
console.log(serializedTx);
const signature = await eth.signTransaction(
"44'/60'/0'/0/0",
serializedTx,
resolution,
);
console.log(signature);
//Parse the signature
signature.r = "0x" + signature.r;
signature.s = "0x" + signature.s;
signature.v = parseInt("0x" + signature.v);
signature.from = address;
console.log(signature);
//Serialize the same transaction as before, but adding the signature on it
const signedTx = ethers.utils.serializeTransaction(unsignedTx, signature);
console.log(signedTx);
const hash = (await provider.sendTransaction(signedTx)).hash;
console.log(hash);
setUrl("https://sepolia.etherscan.io/tx/" + hash);
};
return (
);
}
export default SmartContract;
```#### ethereum.jsIn "ethereum.js", copy-paste the following code:```javascript copy
import { Contract } from "ethers";
const getBlockchain = (provider) =>
new Promise(async (resolve, reject) => {
if (provider) {
const simpleStorage = new Contract(
"0xA0aB0fae9C6b4882dC3690cb1705D5Aeb8c436d7",
[
{
inputs: [],
name: "data",
outputs: [
{
internalType: "uint256",
name: "",
type: "uint256",
},
],
stateMutability: "view",
type: "function",
},
{
inputs: [],
name: "readData",
outputs: [
{
internalType: "uint256",
name: "",
type: "uint256",
},
],
stateMutability: "view",
type: "function",
},
{
inputs: [
{
internalType: "uint256",
name: "_data",
type: "uint256",
},
],
name: "updateData",
outputs: [],
stateMutability: "nonpayable",
type: "function",
},
],
provider,
);
resolve({ simpleStorage });
return;
}
reject("Provider not recognized");
});
export default getBlockchain;
```### Dependencies InstallationRun:```console copy
npm install --save bootstrap
npm install --save ethers@5.4.7
npm install --save @ledgerhq/hw-app-eth
npm install --save @ledgerhq/hw-transport-web-ble
npm install --save buffer
npm install --save next
```| Package | What does it do? |
| ---------------------------------------------------------------------------------------------------------------------------------- | --------------------------------------------------------------------------------------------------------------------------- |
| [bootstrap](https://getbootstrap.com/) | It allows you to use the Bootstrap CSS framework. |
| [ethers](https://docs.ethers.io/v5/) | It provides you with all the methods to interact with the Ethereum blockchain. For this tutorial, we use the 5.4.7 version. |
| [@ledgerhq/hw-app-eth](https://github.com/LedgerHQ/ledger-live/tree/develop/libs/ledgerjs/packages/hw-app-eth) | It will help you ask your Nano to access the ethereum address. |
| [@ledgerhq/hw-transport-web-ble](https://github.com/LedgerHQ/ledger-live/tree/develop/libs/ledgerjs/packages/hw-transport-web-ble) | It provides you with all the methods to interact with your Ledger Nano X with a Bluetooth connexion. |
| [buffer](https://www.npmjs.com/package/buffer) | The goal is to provide an API that is 100% identical to node's Buffer API. |#### Package.json DependenciesNow that the dependencies are installed you can find them in the "package.js".
This is how your "package.json" shoud look like:```javascript copy
{
"name": "e2e-tutorial-contract",
"version": "0.1.0",
"private": true,
"dependencies": {
"@ledgerhq/hw-app-eth": "^6.35.6",
"@ledgerhq/hw-transport-web-ble": "^6.28.4",
"@testing-library/jest-dom": "^5.17.0",
"@testing-library/react": "^13.4.0",
"@testing-library/user-event": "^13.5.0",
"bootstrap": "^5.3.3",
"buffer": "^6.0.3",
"eip55": "^2.1.1",
"ethers": "^5.4.7",
"next": "^14.1.3",
"react": "^18.2.0",
"react-dom": "^18.2.0",
"react-scripts": "5.0.1",
"web-vitals": "^2.1.4"
},
"scripts": {
"build": "next build",
"dev": "next dev",
"start": "next start"
},
"eslintConfig": {
"extends": [
"react-app",
"react-app/jest"
]
},
"browserslist": {
"production": [
">0.2%",
"not dead",
"not op_mini all"
],
"development": [
"last 1 chrome version",
"last 1 firefox version",
"last 1 safari version"
]
}
}
```## Web App Test### Start the Development ServerRun:```console copy
npm run dev
```> **Warning:** All the browser do not support the Bluetooth please look at the{" "}
> {" "}
>
> browser support{" "}
> .Now the application is up and running. Open the browser and go to `localhost:3000`, it will display :
_Fig. 2: Application Running on Browser_Don't click on the button yet.### Launch the Ethereum AppBefore clicking on the button, unlock your Nano X and run the Ethereum application.
The steps are described below.\
Fig. 3: Ledger Enter Code Pin\
Fig. 4: Ledger Application\
Fig. 5: Application is running> **Warning:** For the tutorial to work, go to the Ethereum app settings and enable Blind
> Signing.### Connect Your Nano to the ApplicationNow you can click on the button and a popup opens. Choose your Ledger Nano X and click connexion.
_Fig. 6: Connect the Ledger with Bluetooth_### Read the data of a Smart ContractNow you can click on the button "Get Data" to read the data of the smart contract. Then the data will be displayed on the screen.
_Fig. 7: Get data from a smart contract_### Update the data of a Smart ContractNow instead of reading data, we will overwrite the data by calling a function of the smart contract which is "UpdateData".
_Fig. 8: Change data from a smart contract_### Verify the Address on your NanoFor security reasons, the address will also be displayed on your Ledger Nano X to verify and confirm the address.\
\
\
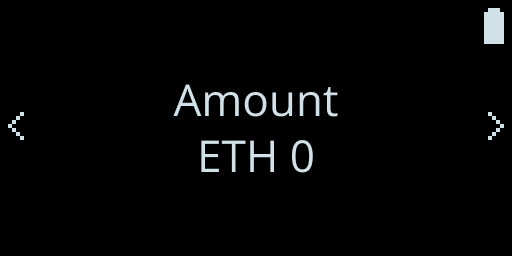Fig. 9: Nano Review ScreenFig. 10: Blind Signing info ScreenFig. 11: Nano Amount Screen\
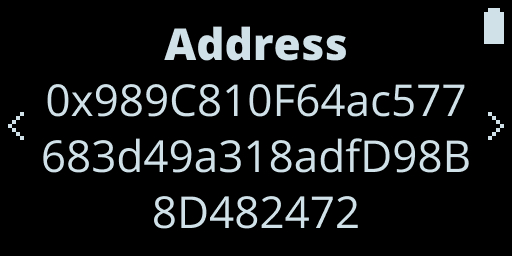\
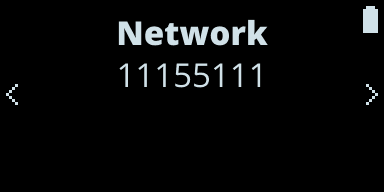Fig. 12: Nano Address ScreenFig. 13: Nano Network Screen\
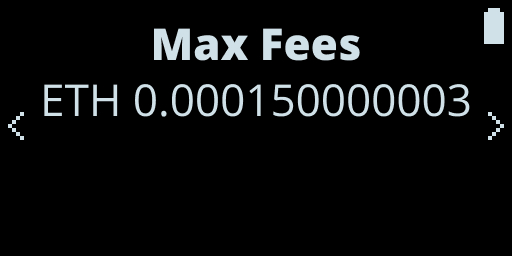\
Fig. 14: Nano Max Fees ScreenFig. 15: Nano Accept and Send Screen> **Warning:** For the Smart Contract call you need to allow blind signing because the smart
> contract that is called in the tutorial is not yet verified and reviewed by
> Ledger. But if the smart contract you are calling is accepted by Ledger do not
> enable blind signing. Moreover, we do not recommend enabling blind signing in
> other situations as the main purpose to sign with Ledger is the 'Sign what you
> see' system. And by enabling blind signing it can not ensure that what you see
> is what you get.### Review the Transaction on Sepolia EtherscanBy updating the data a transaction is created to change this data, it can be verified on Sepolia Etherscan.\
_Fig. 15: Sepolia Etherscan_Wait till the status passes to Success.\
_Fig. 16: Sepolia Etherscan_### Verify the update of dataFinally, to verify if data was updated, open the web application and click on "Get data".\
_Fig. 17: Verify the data_\
_Fig. 18: Verify the data_Congratulations, you have successfully built your first application connected with Ledger!